
Co-written with Skrat.
Genre: Fantasy (can be adapted to other genres)
Primary Focus: Exploration
Secondary Focus: Combat
Time: 14-46 hours (7-23 2-hour sessions)
Complexity: 2
Welcome to the Spark of Waki Adventure, which takes a group of adventurers from Level 1 to 6 and introduces you to the most important mechanics of Ishanekon: World Shapers. The main focus of this campaign is the exploration of the five lost Waki Islands that are said to contain a legendary treasure, the so-called Spark of Waki. Some say that it is a giant gem of untold value. Others say that it is a magical object of unfathomable power. Whatever it is, you play as a group of adventurers or explorers willing to risk it all, be it for power, wealth, or fame. Are you ready to dive into the unknown?
Setting
This module is designed to be easily inserted into any classic fantasy setting that contains an ocean. You are not required to specify the setting if you prefer, since the mainland is never visited. With some modifications, it can also be inserted into a modern, non-magical world, or other setting.
You will be playing as a group of adventurers, explorers, or something else of the sort. You’ve found a treasure map that leads to the Waki Islands. You will be aware of the legends and have decided to find them and unearth the Spark of Waki, whatever it might be. How did you find the treasure map? You decide. Maybe you won it while gambling, a shady merchant sold it to you, or you found it in an old ruin.
You, as a group, decided to pool all your money together to hire a ship. You did not have much, so all you could manage was the Coconut, a ship full of outcasts and weirdos. Not the most professional crew, but it will have to do.
Character Suggestions
You can find a collection of fitting characters in the Generic Fantasy Section of the pregenerated Setting-Dependent Characters page if you go down the fantasy route. There are also some other character suggestions fitting for other settings.
Background Information for the GM
WARNING: This is the place where you stop reading if you are a player and not the gamemaster, understood? I am warning you. Do not ruin the fun for yourself and the group!
MAJOR SPOILER WARNING!!! So, are the players gone? Good!
So, what is the deal with the Waki Islands? The truth is that they are not really islands but fragments from other universes.
Over 300 years ago, five individuals from different worlds each made a deal with a demon named Xeldrun. As part of the deal, all of them gained the ability to travel through the multiverse, but were forced to serve the Demon whenever he called.
All five of them came to regret the deal and plotted together to seal their master away. They researched powerful magic until they found a ritual that could do the job. Each of them participated, doing their part of the ritual in their home universe. The ritual worked in the sense that Xeldrun was sealed away in a large dark crystal, but since their souls were bound to him, the spell also sealed them away and pulled a fragment of each of their worlds into the world where the Demon was sealed, which is the world where the adventure takes place.
This happened 314 years ago. Xeldrun might be sealed, but some of his cultists remain. They know that bringing the five crystals, each holding one of the sealed souls, together will reveal and open their master’s prison. They would have done it themselves, but the islands are full of dangers, including five mighty guardians (servants of the five) that guard the crystals. Picking up any of the five crystals will fill the person with a sense of unease.
Instead, they started spreading rumors of the Waki Islands and the Spark of Waki to trick some adventurers into freeing Xeldrun. Those Cultists are probably the reason why the player characters found the map in the first place.
| Name | Species | Location | Description |
|---|---|---|---|
| Jenika | Nor | Blan (The Dodecahedron) | Made a deal with Xeldrun. She was an explorer and scholar who wanted to learn of other worlds. |
| Odexes | Merfolk | Mavi (Kraken’s Rest) | Made a deal with Xeldrun. He was a warlord who wanted to conquer the oceans of other worlds. |
| Rinjits | Kappa | Madow (The Left Eye) | Made a deal with Xeldrun. He was a master thief who could not resist the thrill of stealing from other worlds. |
| Jupjup | Goblin | Merah (The Heart of the Island) | Made a deal with Xeldrun. He was a friendly, brave goofball who was tricked into the bargain. |
| Cozal | Saurian | Berdea (Giant Tree) | Made a deal with Xeldrun. She was an orphan, left behind, and about to starve when the demon “saved” her. |
| Xeldrun | Demon | Center (The Spark of Waki) | A demon that can travel to different universes who offers that power to others in exchange for their souls and servitude. He serves a greater unknown evil. |
How to run the Adventure
The players start off at Level 1. They will reach Level 2 after leaving the Unnamed Island. After that, they will gain a level after gathering enough milestones, which they gain through exploring points of interest on the map other than native villages. A normal location brings them one milestone, while gaining one of the five crystals grants them 2. See the table for milestones needed to level up.
| Level 3 | Level 4 | Level 5 | Level 6 |
| 2 Milestones | 4 Milestones (6 total) | 4 Milestones (10 Total) | 5 Milestones (15 total) |
The islands also have plenty of items that can be found. Since every adventuring group is different and has different builds, I recommend not being too strict with the item type. Every time such an item is described in this adventure, it will suggest alternatives. If none of those suggestions fit, you can also pick something else.
When using creatures for a combat encounter, use the Encounter Calculator to calculate their Level. The adventure will link to official creatures in the creature list and suggest a number of creatures to use. Add the number of players and their Level.

Afterward, go to the Auto Fill Options and add the number of creatures recommended by the encounter. Sometimes the adventure proposes a range of creature numbers. In that case, go with a lower number if you have a small player group (1-2), something in the middle if the group is medium-sized (3-4), or the maximum number if you have a large group (5-6). Then adjust the Max Percentage to fit with the difficulty you are aiming for. See the following table for suggestions.
| Difficulty | Suggested Max Percentage | Suggested for Boss Encounters |
|---|---|---|
| Easy | 75% | 90% |
| Medium | 100% | 115% |
| Difficult | 130% | 150% |
| Hardcore | 175% | 225% |
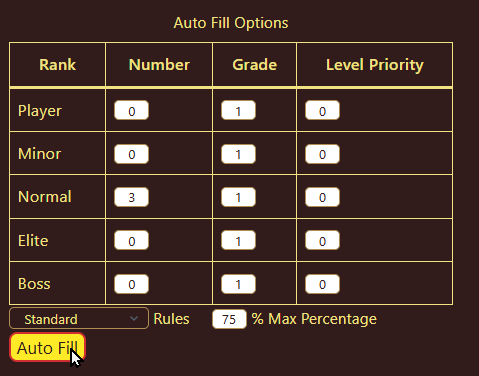
The creatures will then be added to the Enemies table with the suggested Levels. Use that Level when running the encounter.
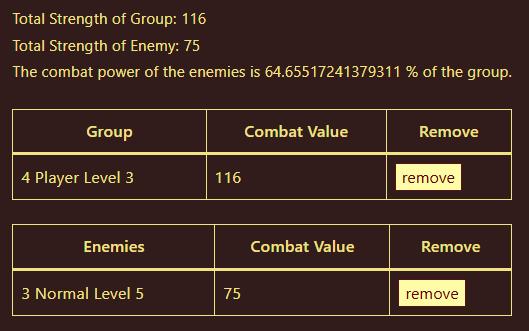
When only using one creature for a group of at least 3 players, I highly recommend using grades to make the combat less swingy and easier to control. If the suggested creature is not a Boss creature, I suggest running it as a pseudo-boss. I recommend a grade of 2 for 3-4 players, a grade of 3 for 4-5 players, and a grade of 4 for 6 players. You can adjust the grade in the Auto Fill options, right next to the number of creatures.
If you prefer a more realistic approach for encounter strength instead of scaling it with the Level of the party, treat every random encounter as if the players were level 2, every explorable location as if they were level 3, every crystal guardian as if they were level 5, and the final encounter with Xeldurm as if they were level 6.
The Adventure
Your adventure begins on The Coconut. A small ship with an effective, but questionable crew. The Coconut counts as a modest resting place should the players require rest, meaning they can restore 3d4 Temporary Vitality on a Full Rest.
While you may not be the captain of The Coconut, you are certainly the captain of this adventure. As such, you should probably get to know the NPCs. Below you will find the descriptions of important NPCs on The Coconut.
As always, these are guidelines to help you in running the adventure. Should you decide to add a peg leg to an NPC or some other change, you are more than welcome to.
Captain Amajia Thermado
She’s a quirky little gnome with vibrant pink hair. Captain of The Coconut, but also a Level 3 Master Technomage obsessed with both technology and magic. While she may be a quirky little individual, she earned her title by consistently putting her crew above everything else.
Whenever the players return to The Coconut, she will curiously prod the players about what they found while out adventuring. Should the players have the need, she can craft and upgrade items for a fee. If the players have the materials, she will only charge half price. She will recommend the following upgrades to the player characters, should they not know what to pick:
- For weapons, either Improved Weapon or Precise Weapon
- For armor, either Lighter Armor, Extra Armor, or Defense Matrix.
- For equipment, either Vitality Boost or Willpower Boost.
If player(s) have the Crafting skill themselves, she will allow the use of her Modest Crafting Station, free of charge.
Things you may hear Captain Amajia say:
- “Alright, lads, what’d you find out there? Got any new gadgets and gizmos?”
- “You said WHAT about my ship?”
- “I’ve never had an extra bolt when putting something back together … except for that one time.”
- “If this wasn’t my favorite wrench, I’d be hitting you upside the head with it right now.”
Eberk Ironpot
Every ship needs a good cook, but at least The Coconut has a cook. Eberk Ironpot, despite the gruff exterior Dwarves are known for, is a gentle soul. His bushy white beard covers most of his face. So much so that when he eats, it seems as though food just disappears into his beard.
Eberk Ironpot will offer the party a free Modest Meal (3 Temporary Vitality) every day. Players may also purchase Rations for 10 Credits each, and Water for 5 Credits.
Things you may hear Eberk Ironpot say:
- “What is this? Who knows, but it’s going in the stew.”
- “I’d eat that,” (to just about anything)
- “Have you ever had rock soup?”
- “Basil? What’s that?”
Grubzul
When one thinks of a Hobgoblin, they typically don’t have Grubzul in mind. He’s a finely dressed individual with purposely picked colors to accent his red skin and slicked back black hair. A pair of glasses, carefully crafted by Captain Amajia Thermado herself, rests on his face to help him with his more delicate medical procedures.
Grubzul is the ship’s doctor and is by far the most sophisticated of the bunch, leaving many to wonder how he got wrapped up with such a crew.
He can also sell the following to the players:
- Tier 0 Stimulant (150 credits)
- Tier 1 Stimulant (300 credits)
- Healing Potion (200 credits, Ability Consumable 04 WP with the Ability Simple Heal [3AP, 4d6 Vitality at 1m range])
- Cleansing Potion (150 credits, Ability Consumable 03 WP with either Elemental Cleanse, Mental Cleanse, or Physical Cleanse)
Things you may hear Grubzul say:
- “Again? Good sir, I do say, you must be more careful with that blade of yours, this is the third time this week.”
- “While I appreciate your generosity and most unusual talents and taste, I must say, I do question the … long-term side effects of your cooking methods.”
- “Of all the edible items in not just our world but many others, I will never understand why you chose the one that looks nothing like a ship in the slightest.”
- “Oh, did I tell you what I was reading just the other day? Marvelous story and reminds me somewhat of the adventures we’ve had ourselves …” (while stitching somebody’s wounds)
Bobins Dim
Bobins Dim is one grumpy human, and nobody knows why he took the job in the first place. Despite having many opportunities to leave The Coconut and its crew, he always chose to stick around and help out wherever he was ordered to. While this means he doesn’t particularly excel at anything, it also means he knows his way around the ship rather well.
Whenever the party wishes to go to an island, Bobins will be the one to row them to shore and back. And yes, he will definitely complain the entire way.
Things you may hear Bobins Dim say:
- “I swear, I don’t know what’s gonna kill me first, rowing this dang boat back and forth or Eberk’s cooking!”
- “That blasted goblin always reading books. Didn’t no good come out of no book.”
- “She’s a good captain, but by the stars she cannot name a ship to save her life.”
- “When are we finally gonna find some treasure?”
The Coconut has many more crew members, but the ones listed above are the key members. Feel free to add more dwarves, elves, or whatever you desire that fits your setting and use them accordingly. Feel also free to adjust the names and races of the crew if you are not playing in a classic fantasy setting.
The crew will do what they need to do to get The Coconut to destinations chosen by the player and will wait for the players to return from their adventures. They will, however, refuse to set foot on any of the Waki Islands and will prioritize their own survival above all other orders.
As patient and obedient as they are, food and water are a limited resource. Once the prologue is finished, the party will have 9 days to finish their entire quest before food supplies run too low and The Coconut sails away, with or without the players. Make sure Captain Amajia Thermado explains this to the party.
The Unnamed Island
Before The Coconut reaches the Waki Islands, it will first stop at a small, unnamed, tropical island to stock up on food. This is what allows them to stay for the 9 days mentioned earlier.
Amajia Thermado will ask the players to search the island for a source of fresh water. If players successfully find fresh water, the timer will increase from 9 days to 12 days.
As the players search the island, they will stumble across an old straw hut next to a river, which can be used as a clean water source by The Coconut’s crew. The hut appears to be abandoned when observed from the outside. However, the ghost of Morgan Deberes (Ghost Pirate) dwells in the old hut. He was a pirate marooned on the island by his crew, for they refused to explore the Waki Islands with him.
Morgan Deberes’ dream was to find the Spark of Waki, and after being marooned and never able to find it, his soul was unable to properly rest. If the players knock on the door, he will answer with a worn and gruff voice. Should the players skip knocking because they’ve played one too many video games and instead walk in, they will find Morgan Deberes’s skeleton lying on a bed.
Either way the players approach it, Morgan Deberes will be thrilled to see somebody after being alone for so long. He’ll ask many questions rapidly, such as who they are, where they’re from, and what their boat is like. He’ll invite them to sit and stay a while, then realize in embarrassment that most of his furniture is rotting and falling apart and suggest that maybe they should find a nice rock outside to sit on.
If the players entertain his conversation, it won’t take him long at all to tell them about how he got this way. He survived well enough on his own, but eventually a bad fever finished him off. What he finds worse than dying, though, is that Tobut the Annoying stole his lucky coin, and he was never able to get it back.
If the players inquire about Tobut the Annoying, they will learn that he is a giant toad that lives farther up the stream. Learning this information does not require a Skill Check, and instead only requires a little bit of roleplay.
After telling his tale, Morgane Deberes will automatically assume that the players are looking for The Spark of Waki and offer to trade with them. Get his lucky coin back, and he’ll tell them everything he knows about the islands.
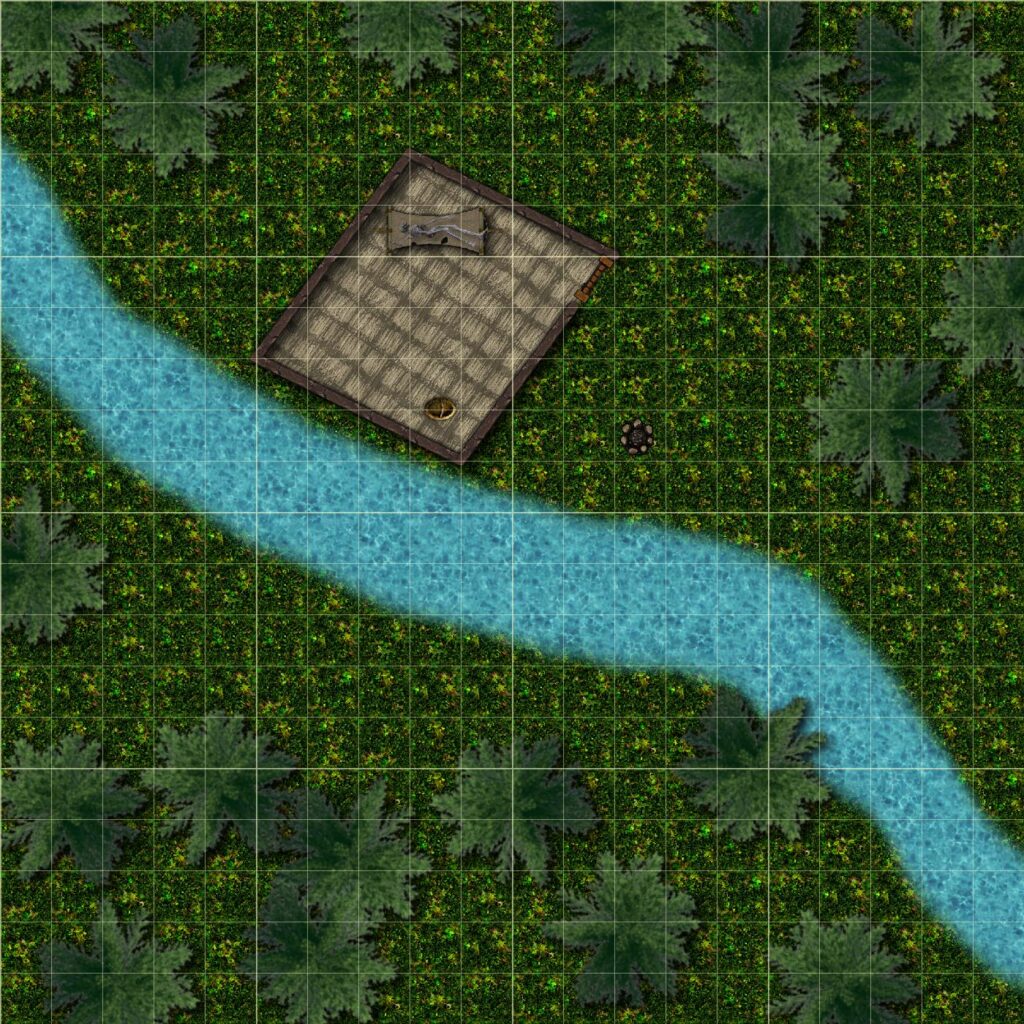
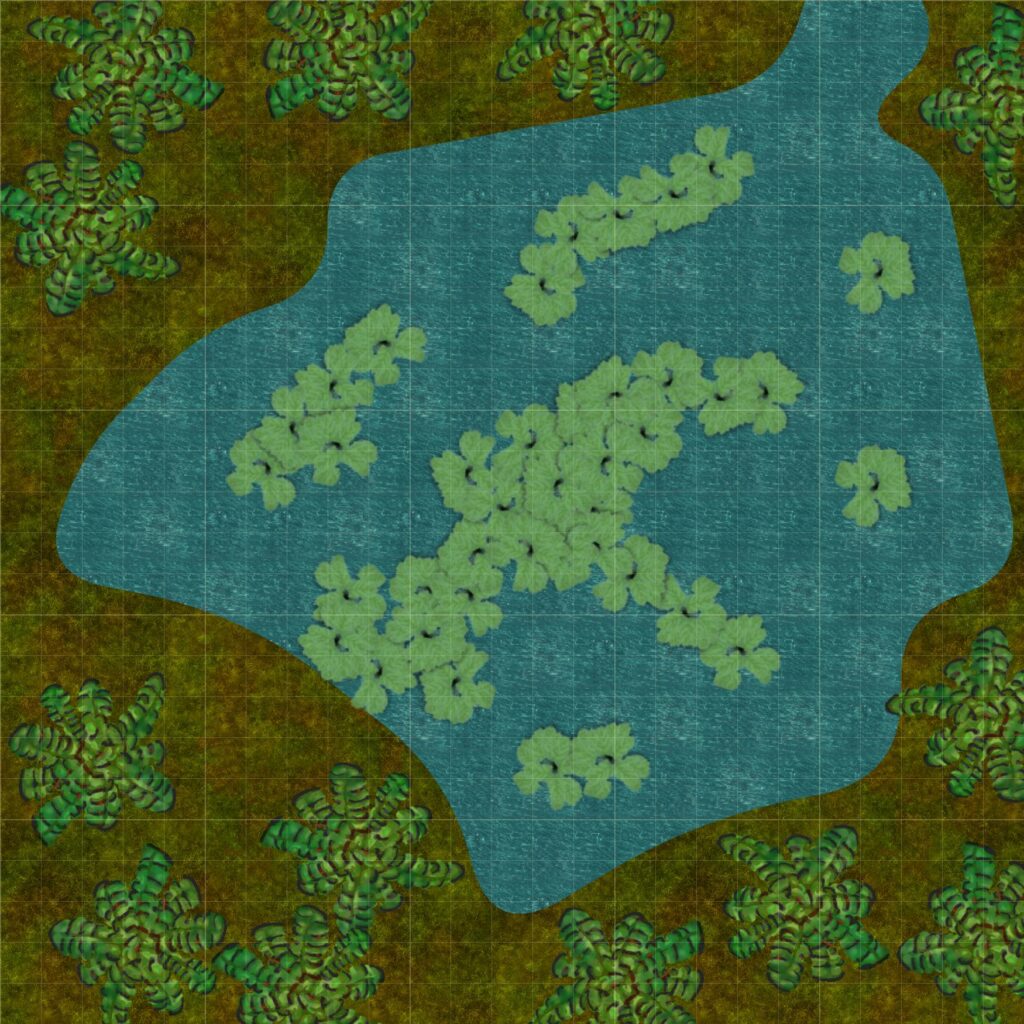
Tobut, the Giant Toad, is not a hard creature to find, for not only is he quite large, but he also spends most of his time lounging in the middle of a pond. He will attack anything and everyone that gets near him in hopes of a tasty meal. Should he manage to grab someone, he will attempt to swallow them whole.
Depending on how the players approach the problem, Morgane Deberes’s lucky coin will be in one of two places. Either it will be in the belly of Tobut or at the bottom of the pond. If the players search either one of those places and fail a Luck Skill Check of 7, then the coin will be in the location they did not search.
GM Note:
To clarify the above, the scene might look something like this: the players have just defeated Tobut the Annoying. A player says, “I want to check Tobut’s stomach for the coin.” He then fails his roll, and the GM responds with, “You carve your way through the giant toad’s belly, finding only remains of fish and other creatures. However, as you’re working, you do catch something in the corner of your eye. A brief glimmer in the bottom of the pond.”
When the players return the coin to Morgan Deberes, he will be overjoyed and share what he knows. Morgan Deberes’s father had told him that one will need to gather five crystals if they wish to reveal the Spark of Waki. Morgan Deberes will seem happy as he recalls his father and the tales of the island, but his ghostly face will suddenly turn to a look of concern, and perhaps even a touch of fear will be noticed by the more astute players.
Morgan Deberes will warn the players of Madow, a swamp enveloped by a thick fog that rings with demonic laughter. Morgan Deberes’s original crew refused to even attempt to explore the fog once they heard the laughter and left the swamp immediately.
Morgan Deberes will pause for a moment, then a smile will return to his face as he looks back to his lucky coin. He will state that today has been a good day, and he was happy to see everyone but has now grown tired and needs to rest. As he makes his way to what is left of his bed, he will rapidly turn more transparent until he is no longer able to be seen.
Morgan Deberes has successfully passed on to the next life.
If the players inform the crew of The Coconut about the water they found, they will come to collect, giving the party the full 12 days to finish their quest. Additionally, if the players mention the giant toad to Eberk Ironpot, he will gather its remains and make a Toad Soup.
When returning to The Coconut and ending the day with a nice meal, you can introduce the important NPC crew members outlined earlier if you haven’t already.
Tip from a writer:
In the world of storytelling, dinner scenes are an extremely powerful narrative tool. If you want, ask the players what their characters prefer to eat and HOW they eat it. Are they delicate? Do they chow down and make a mess? Did Eberk Ironpot make the Toad Soup? How do the player characters respond to it? This is a good way to help players get to know their characters a little better, as well as build a relationship with the crew.
- Skrat
Whether or not you have a dinner scene, the players will all gain a level as well as arrive at the Waki Islands early the next morning after a Full Rest.
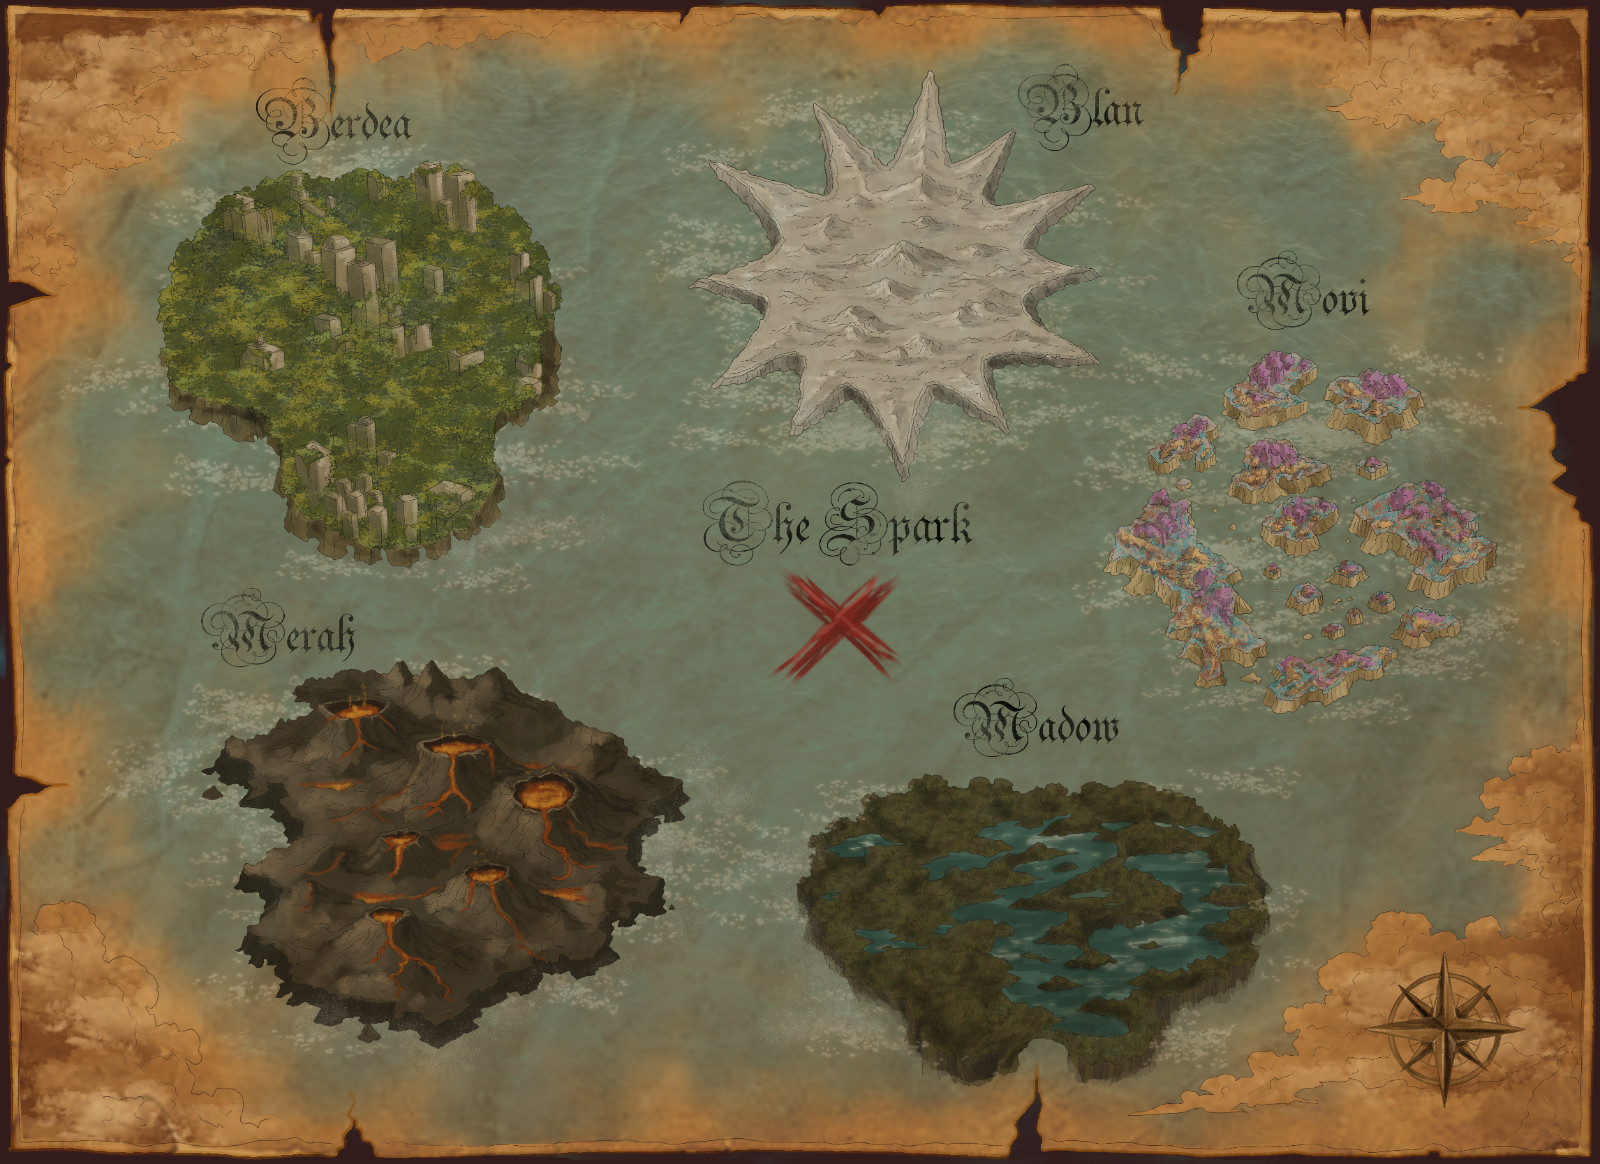
To determine which island The Coconut arrives at first, roll a d10 and consult the following table. You may also choose to skip the randomized roll and instead pick the island yourself. The choice is yours! This is a good time to show the players the treasure map if you have not done so before.
| 1 | Blan |
| 2 | Between Blan and Movi |
| 3 | Movi |
| 4 | Between Movi and Madow |
| 5 | Madow |
| 6 | Between Madow and Merah |
| 7 | Merah |
| 8 | Between Merah and Berdea |
| 9 | Berdea |
| 10 | Between Berdea and Blan |
Blan, the Metal Desert
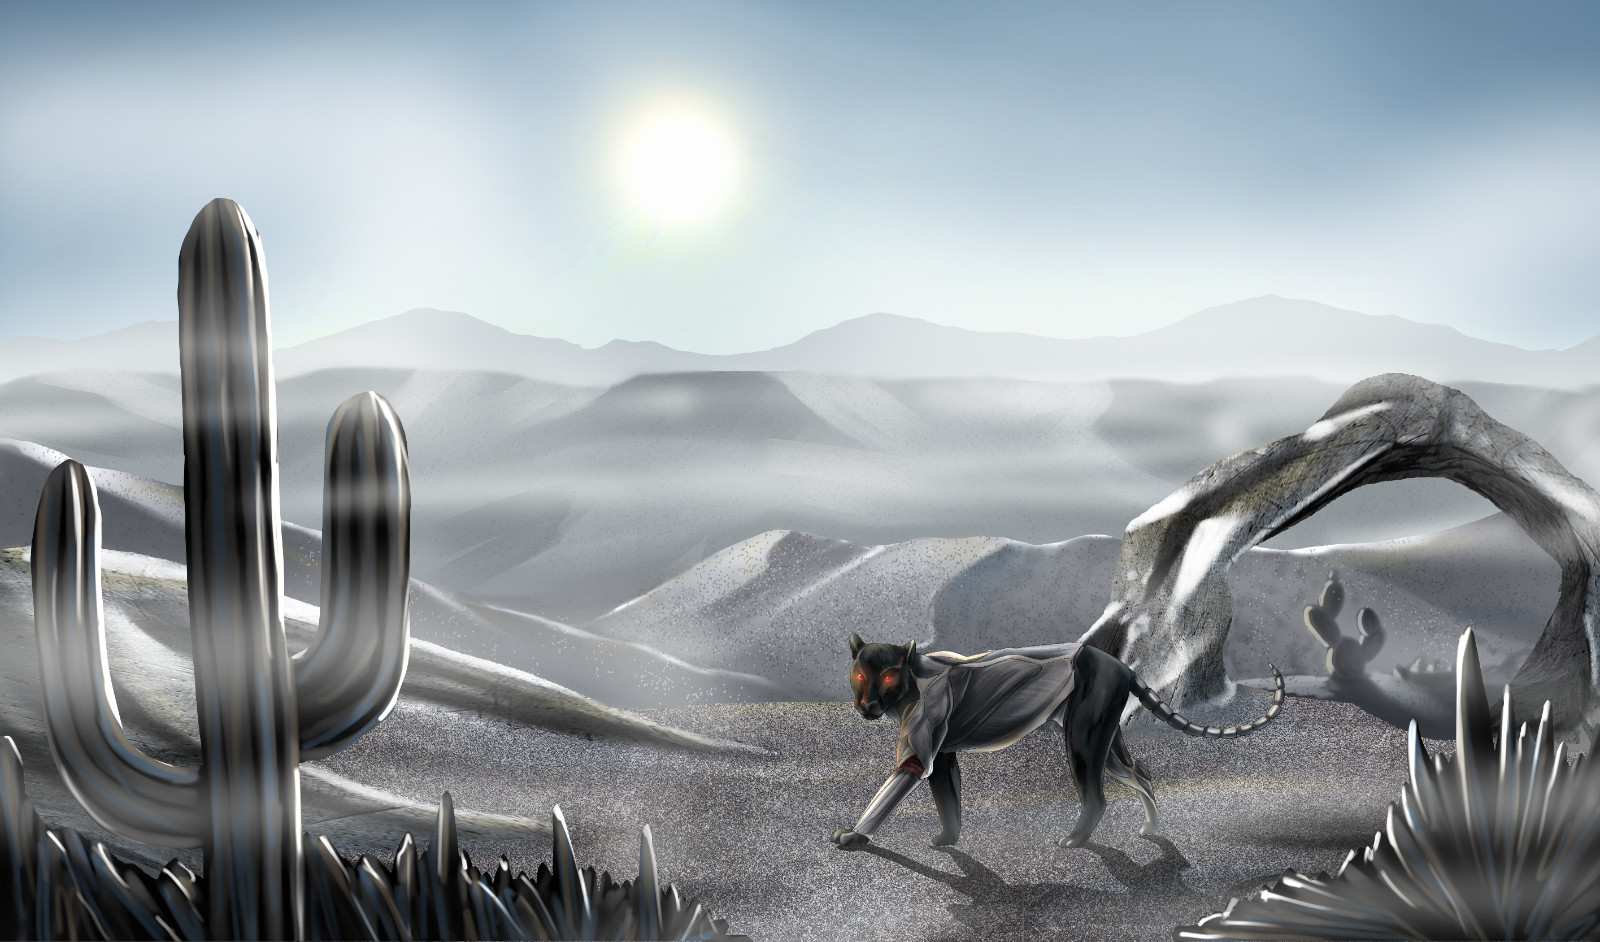
Blan is the fragment of Jenika’s world. While she was away exploring the universe, her own home world, once lush and organic like many others, was ravaged by a nanobot plague and completely resculpted into something else entirely. The nanobots consumed and took over everything, mimicking the world’s likeness while making everything metal and somehow miraculously functioning with its nearly identical ecosystem, as if little had changed.
The metal desert known as Blan is adorned with steel cacti, aluminum tumbleweeds, dunes made of minuscule tungsten beads, and several titanium razor-edged creatures. From a distance, these animals may look like their organic counterparts, but make no mistake, they are deadly machines, inside and out.
Jenika was an explorer and scientist, always wanting to see the unknown. Her civilization was already highly advanced, and most of the planet was documented, not leaving much room for her to satisfy her adventure lust. When Xeldrun approached her, she could not resist the possibility of exploring unknown universes, and she ignored all red flags. Jenika might have been happy to explore the multiverse, but the horrific things that Xeldrun forced her to do started to wear her down.
After years of travel, she came back to her original home world and was completely devastated by the nano apocalypse that she completely missed. This pushed her over the edge. She was the first of the five to try to find a way out of this bondage.
She constructed The Dodecahedron as a base of operations, as well as her robot helper H.U.B. She knew it was too late for her world and there was no hope in restoring it, but she sought to gather knowledge and cultural artifacts from other worlds, so that none of them could ever be completely lost.
When the players arrive at this island, they will be able to see a bright light from The Coconut. This bright, white light will come from the center of the island and should give the players a direction to go as well as a reason to investigate.
While exploring, the players will have to deal with the blazing sun as well as all the metal it continues to heat. Players will suffer one Level of Exhaustion for each hour they do not drink one Water. If the players explore at night, the temperatures will be more tolerable and function as a “normal” day.
Let the players have a moment to roleplay as they traverse the metal desert and deal with the heat. Feel free to ask what they might expect to see in such a place, and use it as you desire. After they’ve traveled for about thirty minutes narratively, choose one of the three following encounters to pit them against.
Option 1: 2-5 Robotic Ambush Predators that look like panthers try to ambush the player characters.
Option 2: A large gorilla-like Metallic Ape Brute is currently eating a robotic panther. It becomes aggressive when it sees the party.
Option 3: 1-3 Iron Cobras attack the group with their poisonous fangs.
Giant Robot
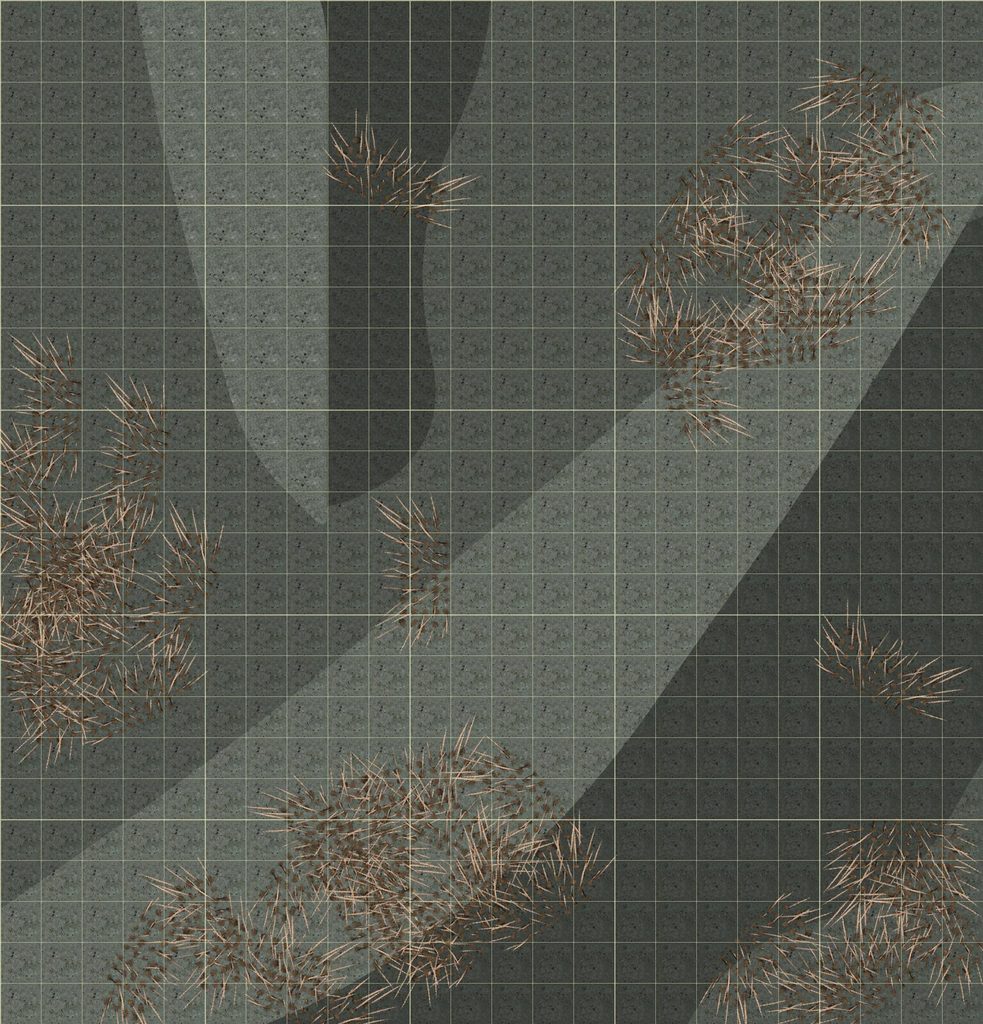
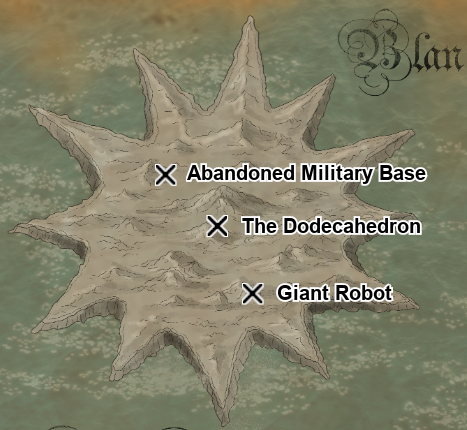
Should the party be traveling on the south side of Blan for around an hour, they will discover what seems to be a giant, rusted robot that is just sitting on the ground. The robot is humanoid in shape, clearly not functioning, and looks as though it was designed for war based on its shoulder cannons.
This 40-meter-tall combat mech broke down in the fight against the nanobot plague. Lacking anything organic, the plague left it to rot once they disabled it and moved on. Now stranded too far into the plague’s conquered territory, the original crew knew that no help would be able to come for them and ended their lives once their food supplies ran dry.
There is a hatch in both arms, each of which may be opened with a Raw Force Skill Check of 6. If another player tries to help at the same time, roll with advantage.
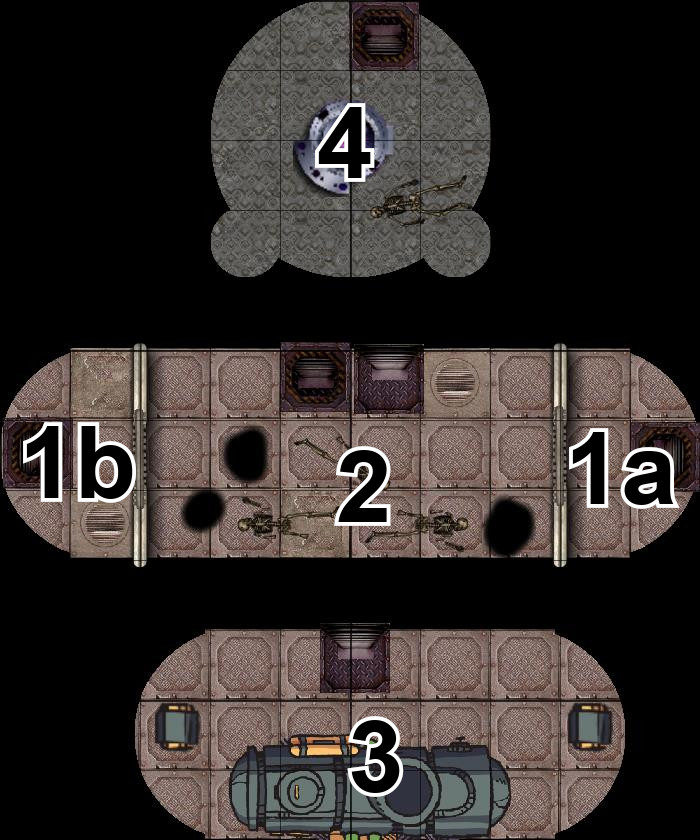
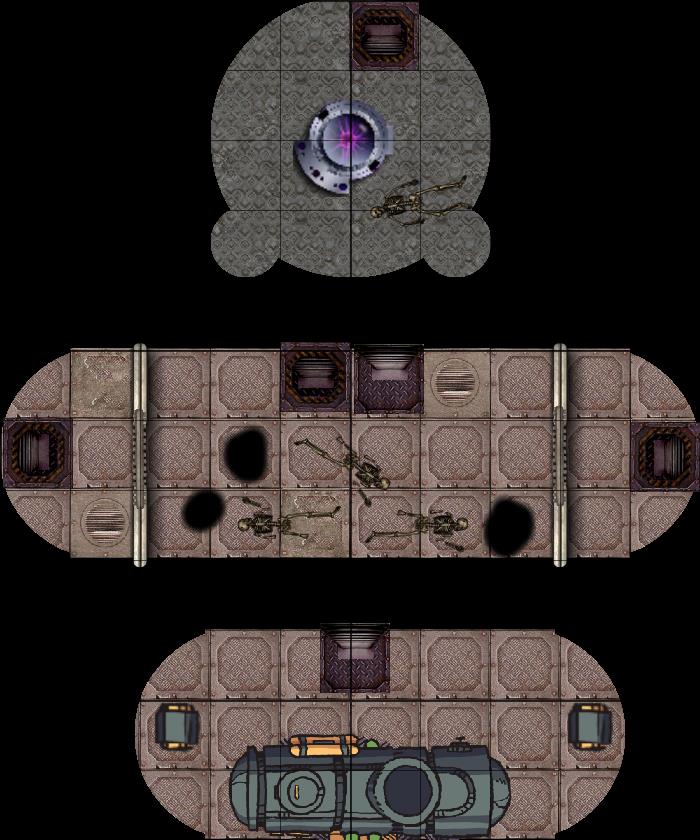
The air within the robot is noticeably cooler than outside, suggesting that there is at least enough power still running through the robot to keep the cooling system going. Once in the arms, players will find ladders that take them up to the shoulders (either 1a or 1b on the map, depending on which arm they went through), allowing them to more easily explore inside the battle mech.
Despite the robot’s rusty exterior, the interior is rather well preserved and made entirely of metal. Several tubes run along the wall near the ceiling, routing themselves throughout the robot’s interior.
The shoulders of the robot are a bit lacking in space and have nothing of interest in them aside from the door leading to the rest of the interior.
When the players go through the door and into the chest of the robot, they will find a more spacious room along with three humanoid skeletons on the floor. Their eye sockets are notably larger than a human’s, and in each skull is a single hole. Looking at the skeletons, it is easy to tell that they are organic, unlike anything else on the island, and that it is indeed bone on the ground and not metal posing as such.
A Medicine check of 7 will reveal that the skeletons are beyond three hundred years old, and that the hole in their head is definitely the cause of death, most likely from a projectile weapon. A Medicine check of 12 or higher will also reveal that their death was suicide, and the weapon of choice is right next to them.
The weapon in question is an Energy Blaster that deals Heat damage. If none of the players are able to wield Tech weapons to a useful degree, make it a regular Pistol, Revolver, Heavy Pistol, or Heavy Revolver that deals Heat damage depending on the needs of the group. Whichever type you choose, the weapon will also have the upgrades Automated Reloader, Improved Weapon, and Precise Weapon
There are also three oil puddles in the room infused with the dark magic of Xeldrun. This dark magic is merely a remnant of Xeldrun’s power that lingered after he was sealed away and corrupts whatever it can. When the players get close to the skeletons, the oil puddles will start to move and attack.
There are two ladders in room 2. One leads down to room 3 and the other to room 4.
Room 3 is the engine room. It can be harvested for materials once with Engineering or Natural Science. Treat it like a Tier 3 Boss creature when calculating the materials. Doing so will turn off the power and cause the inside of the robot to slowly heat up over an hour. Anyone still in the robot until then will start receiving 1d4 Heat damage that ignores Armor every 12 seconds.
Room 4 is the head of the robot and its central control room. One can see out of its eyes. There is one more skeleton on the floor. This one has no hole in its skull. It is the captain who starved to death. There is a control panel in the center. One of its buttons is blinking. Pressing it will display a distress call made by the late captain. It will neither blink nor display the message if the engine room has already been harvested.
The distress call will show a hologram of a grey-skinned humanoid with big eyes and no nose. It has the same uniform as the skeleton in the room. It will say the following: “Our war machine broke down, and we are trapped behind the nanoswarm. I repeat, our war machine broke down, and we are trapped behind the nanoswarm. The hull seems to be keeping the nanobots at bay, but we cannot repair or leave the machine without risking conversion. Please send help. Our supplies will only last for a few days at best.” Pressing the button again will repeat the message.
Abandoned Military Base
There is an old abandoned military base filled with old robots and vehicles in the northern parts of the island. It was once used to fight the nano plague, but was left behind when the soldiers retreated from the unstoppable swarm. It can be spotted relatively easily from afar.
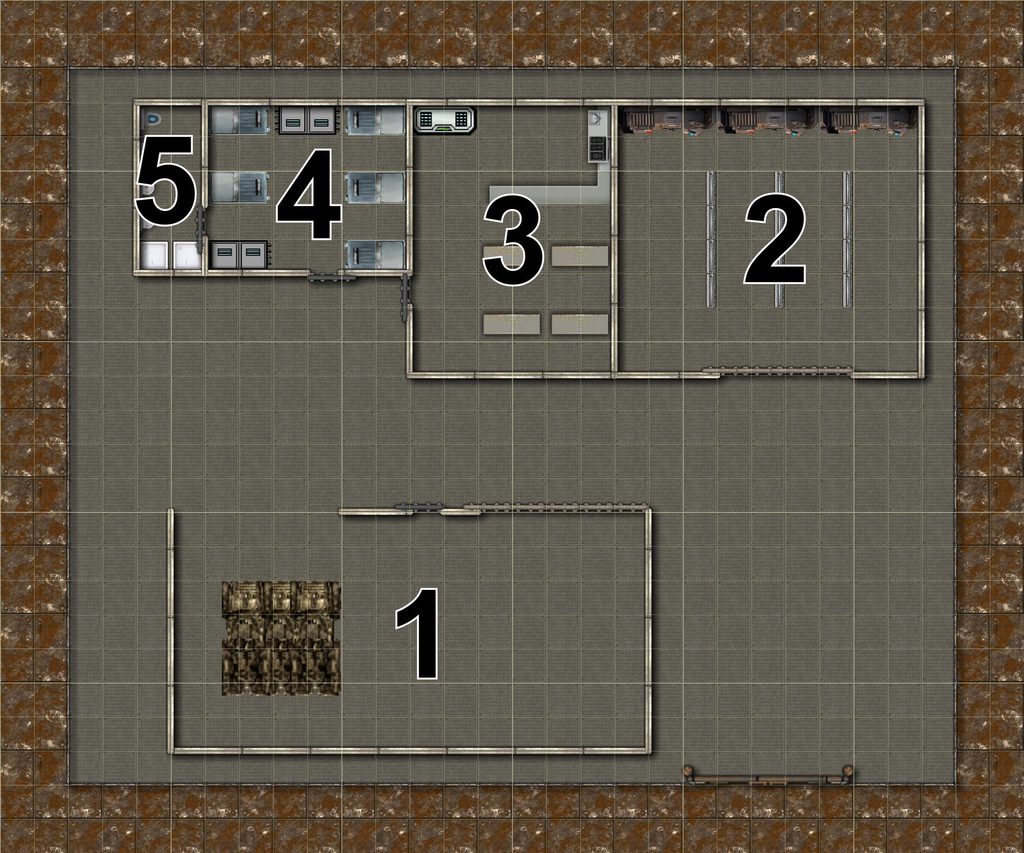
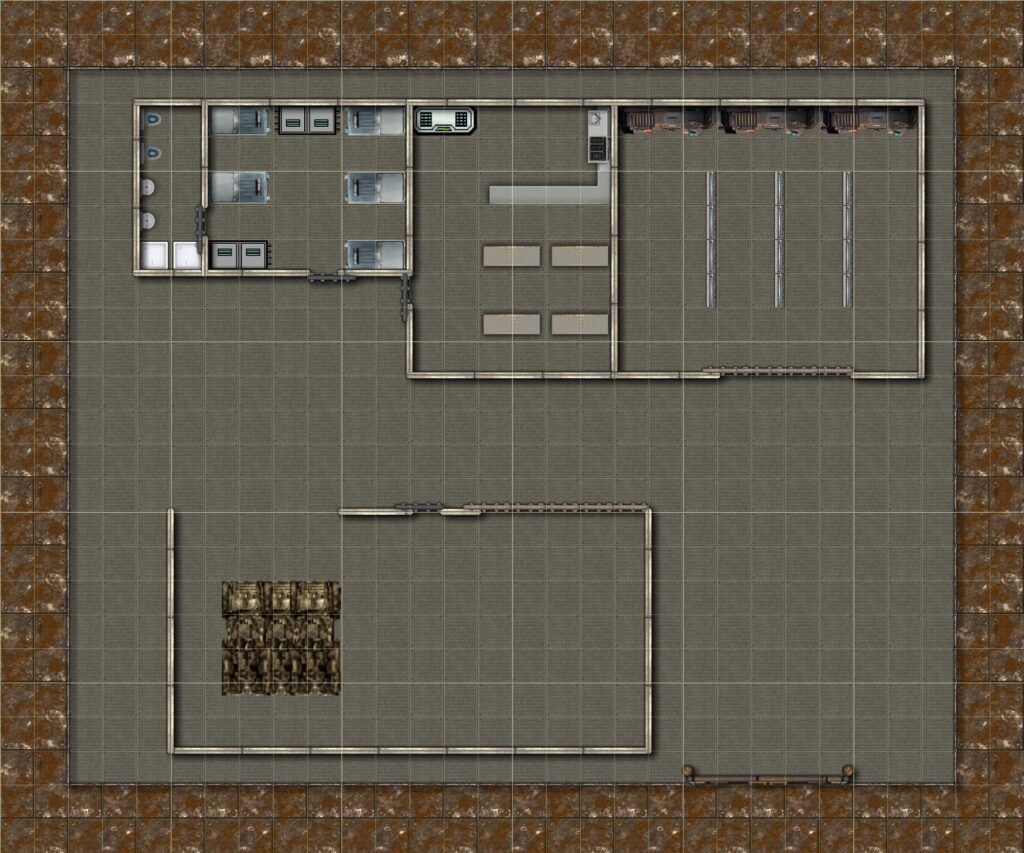
A fence surrounds the perimeter. There is one locked gate that can be opened with a Lockpicking Skill Check of 7 or higher. A player character can also climb over it with an Athletics or Nimbleness Skill Check of 6 or higher. The fence is relatively fragile and can also be destroyed with any attack, but this will trigger an alarm that will activate all robots in the base.
Room 1: The south building is a garage with two large entrances for vehicles and a small one for people. The left large door is broken and permanently open. There are two All-Terrain Vehicles in the garage. The one on the left has been exposed to the elements and has completely broken down, but the one on the right is still functional (not marked on the map; use a token for it). There are 1-3 Military Automata between the two vehicles. They will attack any intruders on sight.
Anybody who investigates the All-Terrain Vehicle can make an Engineering or Vehicle Handling Skill Check. On an 8 or higher, they will understand how to use it. The vehicle is level 6 and comes with enough fuel for 7 days. It can easily move quickly through most terrains, including water. It is fast enough to avoid all random encounters, but so loud that it will alert anybody nearby when used. The Coconut can transport it by pulling it along with a rope, since it floats in water.
Room 2: This is the storage area for all the Robot Troopers. There are 3-8 in there. Opening the garage door will activate them. They attack the party on sight.
Room 3: This is the old canteen. Not much of interest here, other than long-expired food.
Room 4: These are the old sleeping quarters for the biological soldier. Some equipment was left behind in one of the lockers. There is an Energy Rifle that deals Heat damage (alternatively, it can also be an Assault Rifle, Tommy Gun, or Rifle), with the upgrades Automated Reloader and Improved Weapon (twice). There is also a futuristic light, medium, or heavy armor with High Impact Armor (three times). This upgrade represents having an energy field. Finally, there is a equipment (a belt with ammo and an energy shield generator) with the upgrades Infused Ability (Shield) and Temporary Vitality Boost (twice).
Wearing the armor can allow a character to trick the robots. Let them roll a Deception or Disguising Skill Check when a robot sees them. On an 8 or higher, they believe them to be a soldier of their army and will not attack.
Room 5: This is the bathroom. There is nothing of interest here.
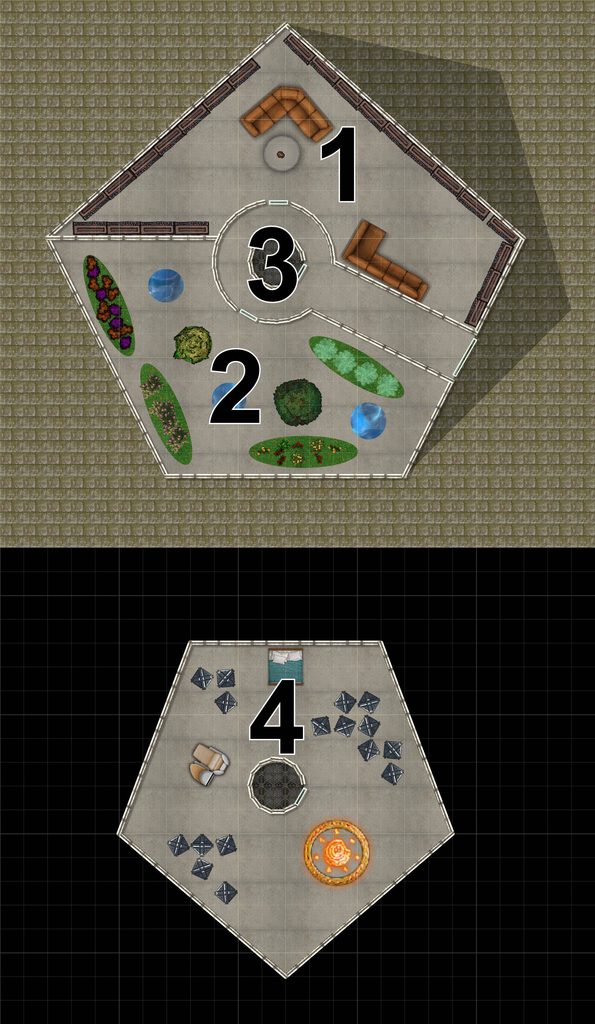
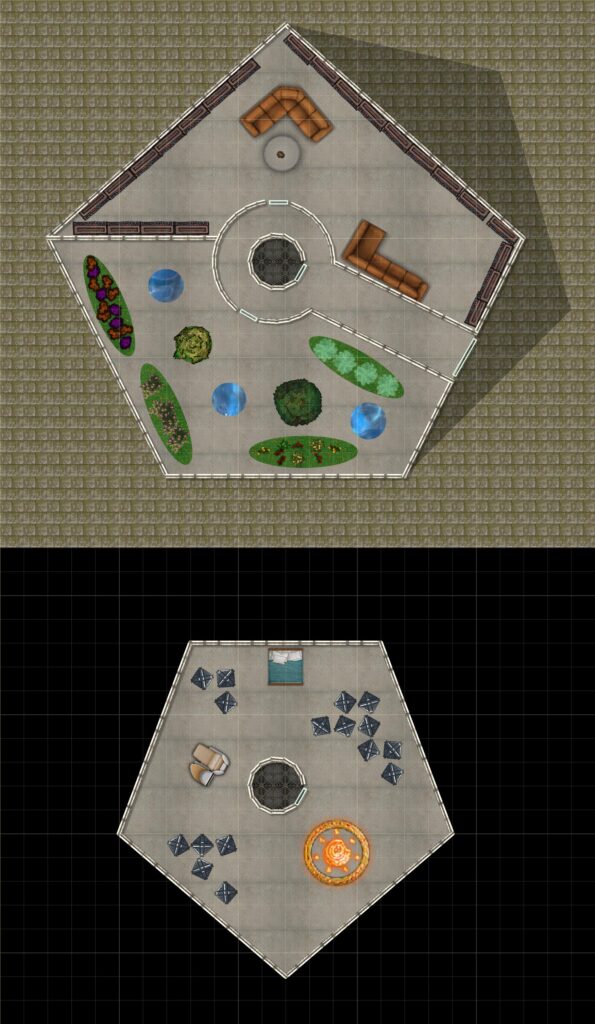
The Dodecahedron
In the middle of Blan stands a 10 m tall dodecahedron. It looks unnaturally smooth. It looks like it is made out of very reflective metal. The only thing that breaks up the perfection is a white light that seems to shine from within the upper parts. Getting close to it from the ground, it seems to cover up the light.
If somebody gets closer, a voice will emanate from the structure asking, “Are you here to eat me?” This is H.U.B. (Helper Unit Bot, Shield Guardian Bot), a robot servant built by Jenika. It is extremely friendly and happy to have any guests, but it knows that most of the wildlife out there wants to eat it, hence the weird question. If the party says no, it will open up the door and welcome them in.
H.U.B. is a humanoid robot with a very basic and unexpressive face. Its design clearly does not look biological, unlike everything else out there, with clearly mechanical body parts. The most noticeable feature is that it has a big hole on the left side of its head. It looks like it was violently blasted off. One of its eyes is missing because of that, and one can clearly see the circuitry inside its head.
H.U.B. was there when Jenika performed the ritual. The energy emitted by it caused an explosion that damaged the robot and caused it to lose most of its memory. Now it only knows that it has to stay here and protect the Dodecahedron and the crystal upstairs. It has kept the place in a pristine state.
The robot will offer its new guest cookies, tea, and soup. It will generally be happy to talk about anything, just enjoying the company, but any questions or statements that remind it of its old master or what happened to her will cause its eye to turn red. H.U.B. will scream in an absolute panic, “MASTER!!! NOOOOO!!!!” before returning to normal and acting like nothing happened, including ignoring the question or statement that might have triggered this.
If the players accept the food offer, H.U.B. tells them to wait, and that they can take a look around. Then it will go to the central elevator, take it down to the servant cellar, and disappear for around 15 minutes before reemerging with a tray full of food and drinks. The cookies, tea, and soup will be of excellent quality. Afterward, it is happy to give them a tour of the Dodecahedron if asked.
Player characters can attempt to fix H.U.B with a very difficult Computer or Engineering Skill Check of 14 or higher. On a success, H.U.B. will remember everything and run upstairs where the crystal containing its master is. After seeing it, it will realize that it is 314 years too late and fall to the ground defeated. Its chipper demeanor will be replaced with a depressed mood. The robot will be willing to share everything it knows, which is pretty much the whole story, and will allow the party to take the crystal in the hopes that they will free its master’s soul when they break the seal.
All walls are transparent from the inside, and one can look outside without any problem.
Room 1: This is the libarby/museum. It contains books and artifacts from different universes. Any character that investigates the books or artifacts can roll a History Skill Check. On a 9 or higher, they will realize that they come from different worlds. The room also contains a table and couches. H.U.B. will serve the food here.
Room 2: This is the greenhouse. It contains plants from all over the multiverse. This is also the place where H.U.B. grows the ingredients for the food and tea it offers. Investigating the plants allows the players to make a Survival or Natural Science Skill Check. On a 9 or higher, they will realize that these plants come from completely alien ecosystems and probably come from different worlds.
Room 3: There is an elevator at the center of the building. It can go up and down, but will not allow anybody other than H.U.B. to go to the cellar. Otherwise, it is easy enough to operate.
Room 4: This is Jenika‘s private quarters. A lot of her old clothes and personal belongings are still in the boxes that are scattered around the room. There is also a floating crystal that contains her soul, surrounded by a magical circle made out of glowing yellow runes. Laying a hand on it will cause H.U.B. to go berserk and fully upcast Move Target to push whoever is touching it away from the crystal, slamming them into the nearest wall. If nobody else touches the crystal in that instant, H.U.B. will regain his senses and act like nothing happened. Touching the crystal a second time or not letting go in the first place will trigger the robot again and start combat with no way of snapping it out of its berserk state.
The party can attempt to be sneaky and take it while H.U.B. is not looking. It will remain peaceful until it notices that it is gone. H.U.B. will not leave the Dodecahedron even if it knows that the group is running away with the crystals, as its programming prohibits it from doing so.
Movi, the Broken Coral Reef
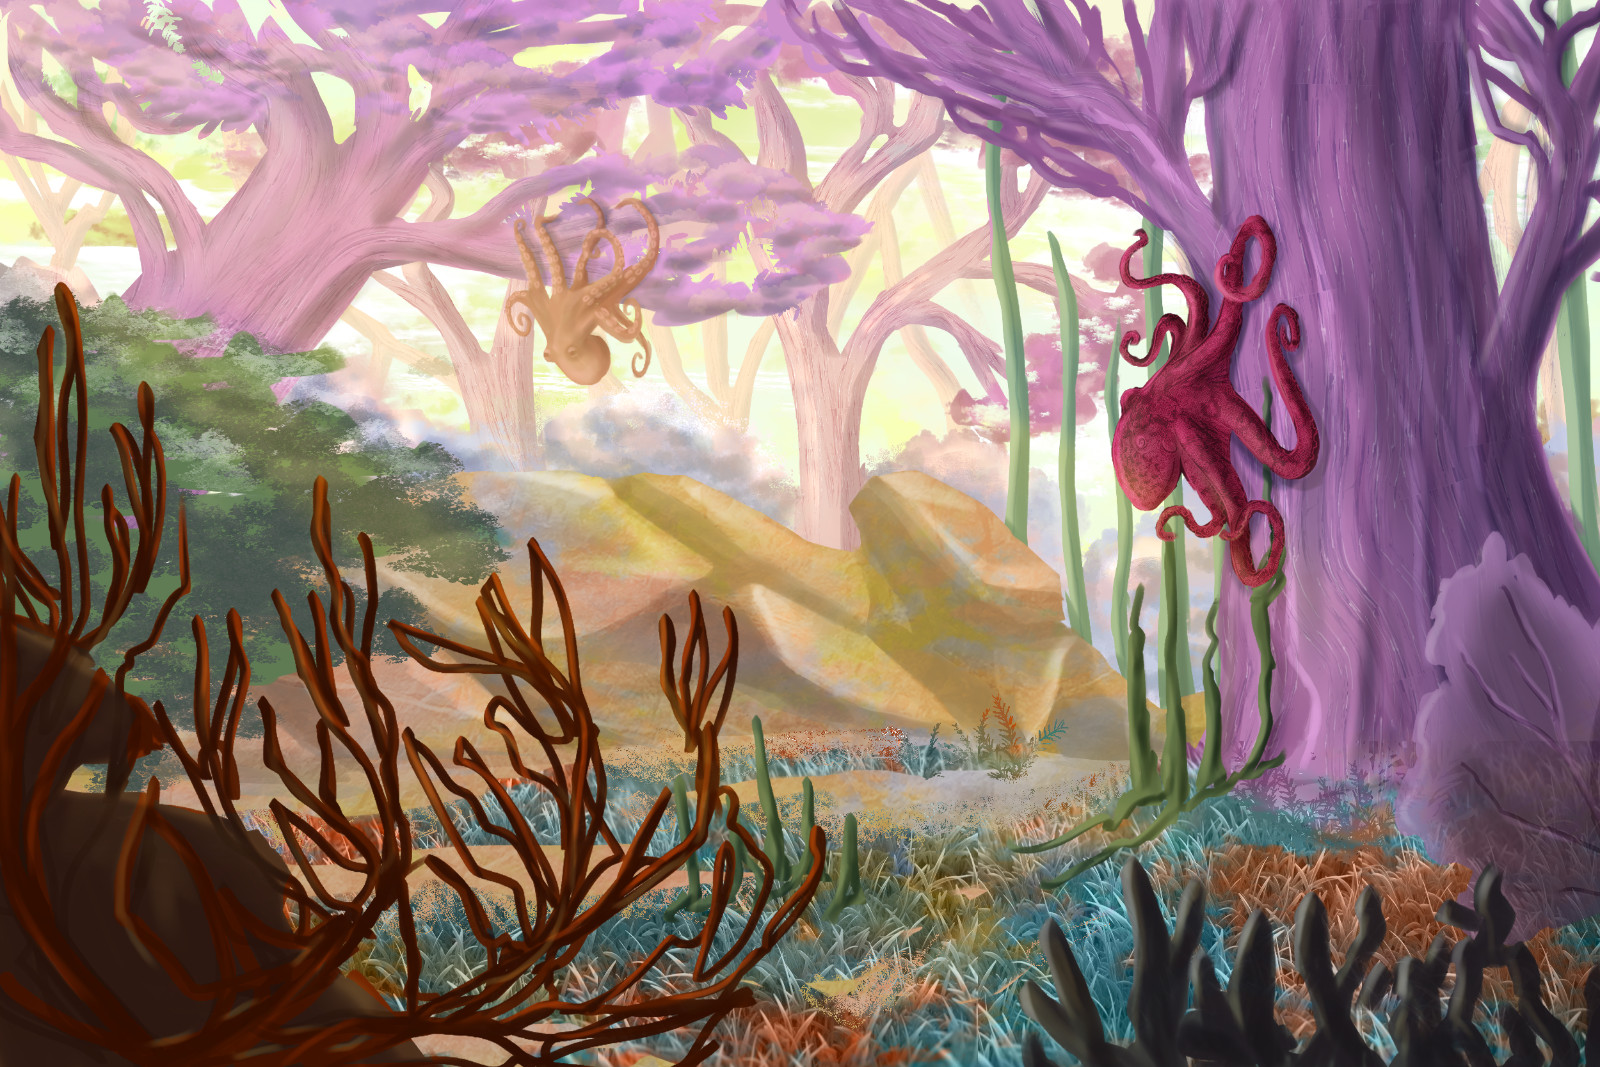
Movi used to be part of the ocean floor when it was ripped out of its home dimension. The sudden magic rearrangement forced the magical flora and fauna to adapt. Corals started growing like trees, fish fly through the sky, octopuses climb on trees like monkeys, and giant crabs roam the islands. Yes, islands plural, as its unique starting position turned it into an archipelago instead of one large island.
Odexes was a mighty merfolk warlord who conquered most of his homeworld’s oceans with the help of a giant mythical Kraken that he inslaved. He accomplished this with the help of a magical trident, called the Trident of Domination, that binds the mind of anything it pierces to the attacker. When there was no more to conquer, Xeldrun approached him with a deal: the power to travel to new oceans on other worlds for his soul. Hungry for more power like most conquerors, he accepted.
Odexes quickly came to regret the pact, as alien oceans turned out to be almost impossible to take. The additional strain on his empire also caused it to crumble away over time. Odexes became nothing more than a soldier Xeldrun used for underwater schemes.
He joined the other four, gathering the secrets of the oceans to help find a way out of their bondage. He left his soldiers behind when casting the ritual. Only the Kraken he enslaved was by his side. Now the Kraken is bound by the mind-controlling trident to protect the crystal his master is sealed in for all eternity.
All islands are quite steep and offer a good vantage point to see all points of interest if the party climbs to the highest point of any of them. The conqueror’s temple and cursed shipwreck can be seen on top of their corresponding islands, and the crystal and its Kraken guardian are easily seen from afar. The two are also on the only relatively flat island found in the center.
The first time the players set foot on one of the islands, trigger one of these random encounters. Feel free to reuse them if they spend a lot of time on the island.
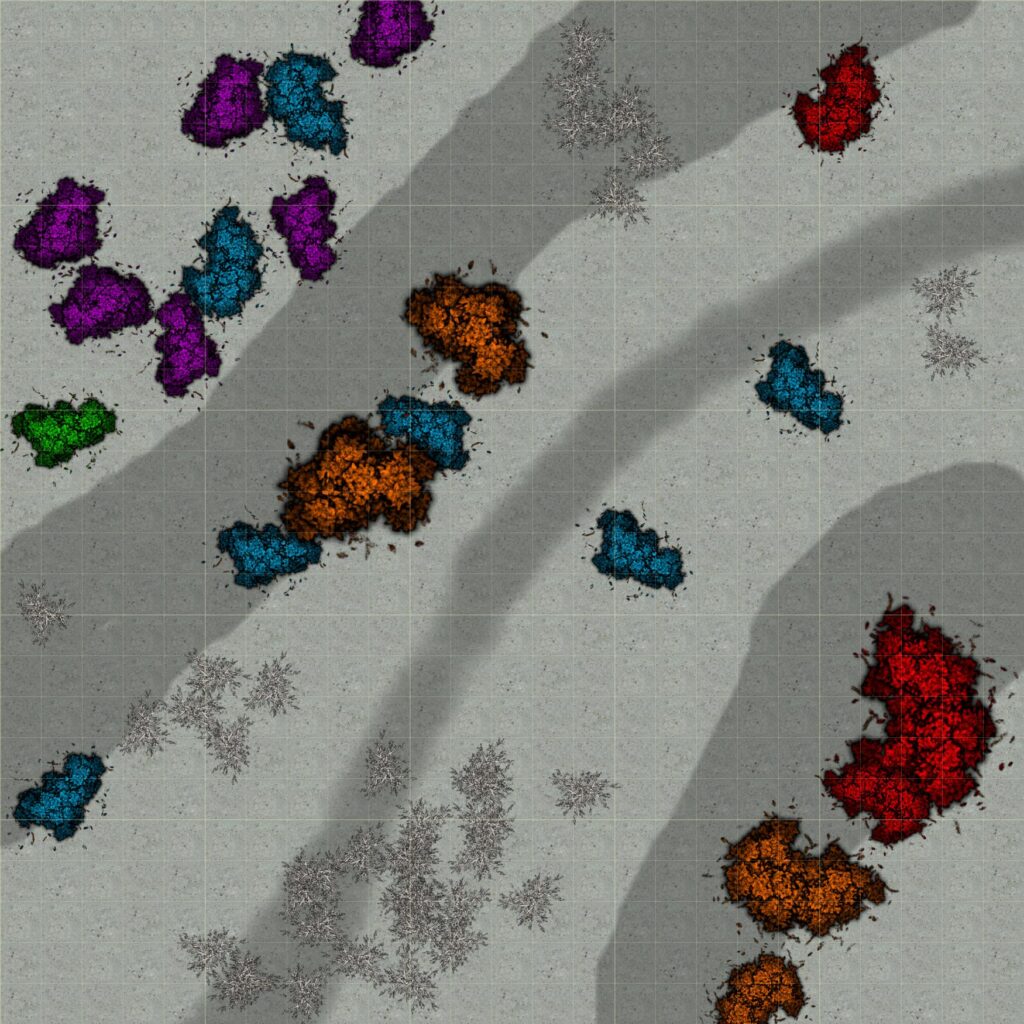
3-5 Land Octopuses try to ambush the party, dropping from a coral tree above. Roll a Stealth Skill Check against the players’ Perception Skill Check to see if they manage to surprise them.
A single Giant Crab attacks them, hungry for its next meal.
2 Giant Land Eels hunt the party as a pair.
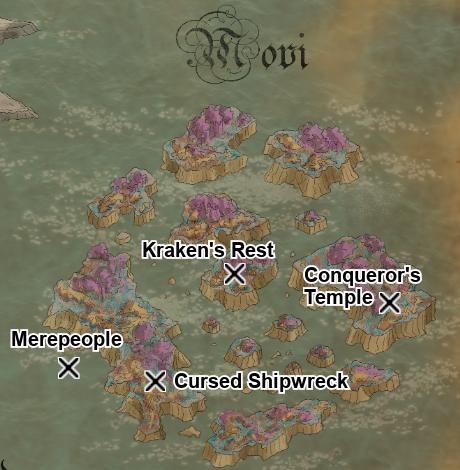
Merepeople
The soldiers that Odexes left behind were also sucked into this new world. They tried to survive as well as they could. Today, their descendants are not much more than a primitive tribe living west of the coast of Movi, only telling stories of the great empire they used to be part of.
They have blue scales all over their bodies and the lower body of a fish. They cannot really move on land and therefore stay away from the islands, sticking to the coastal regions.
If the players sail past the west coast while staying on lookout, let them roll a Perception Skill Check. On a 9 or higher, they will spot some suspicious movement in the water. On a 12 or higher, they will notice that what they just saw was a meremen.
If the players try to investigate what they just saw, meremen warriors with spears will emerge and threaten them to go away. They can try to use a Persuasion Skill check to calm them down. They succeed on an 8 or higher. They have advantage on the roll if they have already defeated the Kraken and tell them. The mereman will immediately back off if the player characters show them the Trident of Domination and show their respect.
If the party manages to talk them down, the meremen will be willing to share basic information about Movi. When asked if they have seen a crystal, they will tell the group about the blue crystal being guarded by the Kraken and warn them that it attacks anything that gets close to it.
The merefolk will generally speak fondly of Odexes, who has become somewhat of a mythical hero to them after generations of oral traditions. They do not seem to be aware that he was a power-hungry warlord.
The meremen are willing to trade for their master’s magical trident and the water gem from the conqueror’s temple, offering five and three days’ worth of fresh food for the coconut, respectively. The trade is not really worth it, but maybe the player characters will feel good for giving them back part of their history.
Conqueror’s Temple
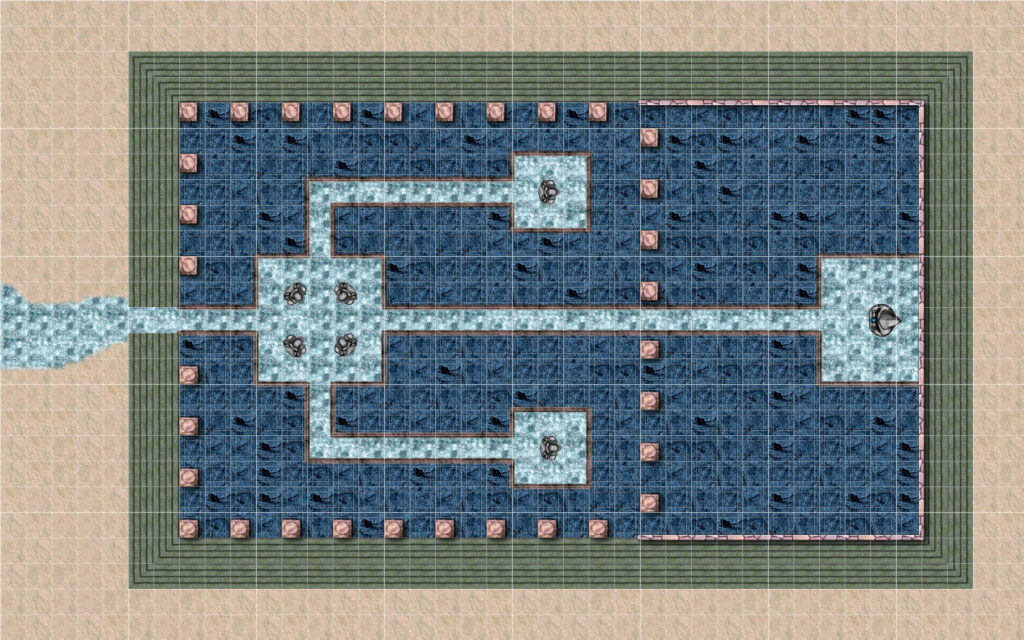
On top of the easternmost island stands a temple dedicated to Odexes. This building is supported by marble columns, and its floor is made of beautiful blue stone. A system of small canals carries water from the main chamber outward, flowing like a small stream that continues downhill into the ocean. The temple is easy enough to spot when close to the island’s coast.
Six statues stand guard in the western entry courtyard. They depict mereman soldiers and are made of white stone. Some of these statues might be broken depending on how big your player party is, because these are not mere decorations. They are, in fact, enchanted and come to life to attack anything that carries out the water gem from the main chamber. Looking at them with Supernatural Vision will reveal the magic. The canal is also magical, preventing any salty water from mixing in, as it used to be underwater.
The main room on the right has a statue of Odexes showing him in a triumphant pose, holding a trident in one hand and a blue gem in the other. This gem is magical and constantly emitting water. It is the source of the water for the canals. The walls are filled with mosaics telling his story. They depict how he found the Trident of Domination and stabbed it into the Kraken while fighting it. It also shows how he commanded armies and the mythical beast in many battles and how he conquered other cities. This is very much intended as a hint for the player about the Kraken‘s weakness (see Kraken’s Rest).
If the players take the gem, a Greater Water Elemental that has been hiding in the water pool will rise and attack the players. This blue gem can be used as a somewhat infinite water source that can be turned on and off at will. The gem will weaken when removed and only produce a small amount at a time. It is especially useful while exploring Blan, as one can counter the extreme heat by drinking water every hour.
If someone leaves the right room while holding the gem, the non-broken Warrior Statues (3-6) will start moving and attack the party.
Cursed Shipwreck
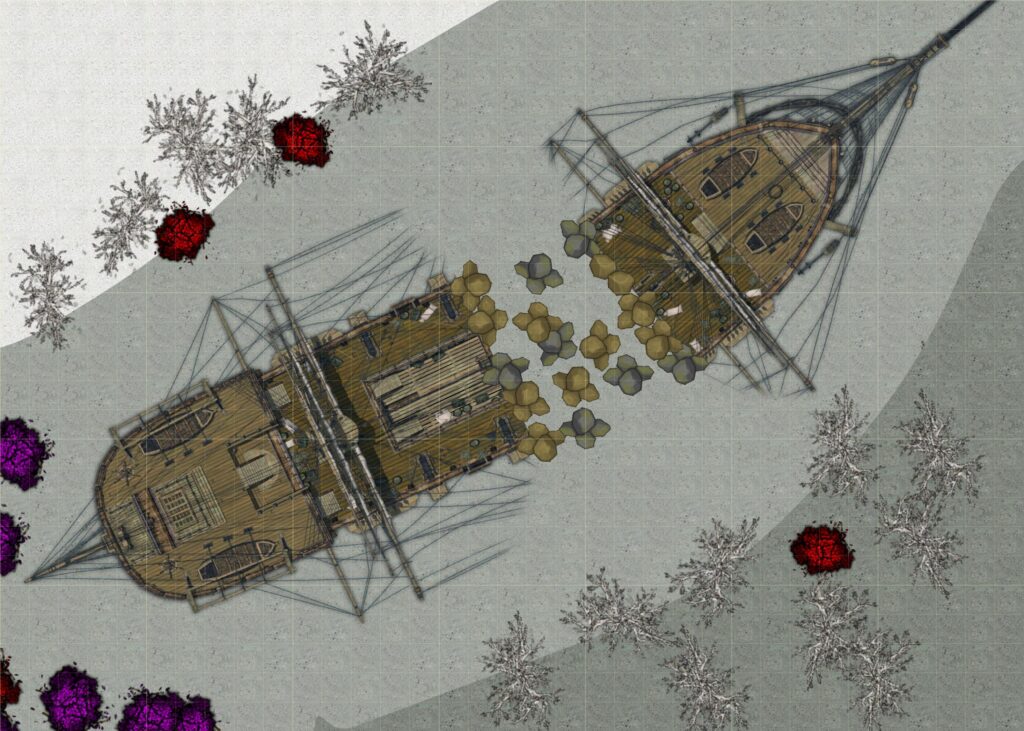
On the peak of one of the western islands lies a broken pirate ship, the Black Scorpion. It fell from the sky when the ocean beneath it disappeared during the ritual that transported the whole seafloor to this world. The impact killed the entire crew, but the dark energies that were released by sealing away Xeldrun reawakened them, turning all the pirates into undead.
Their captain, Cragmaw, saw this as a punishment from the gods and as a sign to turn away from their plundering ways. The rest of the crew disagreed and mutinied, throwing Cragmaw out. The crew became consumed by their hunger for gold, guarding their treasure while their minds deteriorated into a feral state. Captain Cragmaw somehow managed not to go completely insane, plotting to get his ship back for over 300 years.
While the players travel the island, they will start hearing him while he is fighting off a giant crab. He will be very thankful if the party helps him out. Captain Cragmaw will ask the player characters if they are willing to help him take back his ship and promises all of the ship’s treasure in return, which is 2,000 credits worth of gold per player.
Captain Cragmaw has the Undead Pirate stat block and is the same Level as the player characters. Run the Giant Crab like the random encounter, but taking Cragmaw into account as an ally.
Captain Cragmaw will be very excited around the players. All these years alone have taken a toll on his psyche, and he is just happy to finally have someone to talk to. He will occasionally wander off mentally before returning with an iron focus on getting back his ship. He is happy to answer any questions he can.
When arriving at the ship, the entire skeleton crew will be hostile and attack on sight. They have become mindless husks filled with nothing but greed. There are around 6-12 Undead Pirates.
Once his old crew is defeated, Captain Cragmaw will keep his word and give the party all the gold on the ship. Afterward, he will feel very tired, saying that he needs to sit down for a moment. Once he is resting, he will have one final breath before dying, having fulfilled his goal and finally being able to let go.
Kraken’s Rest
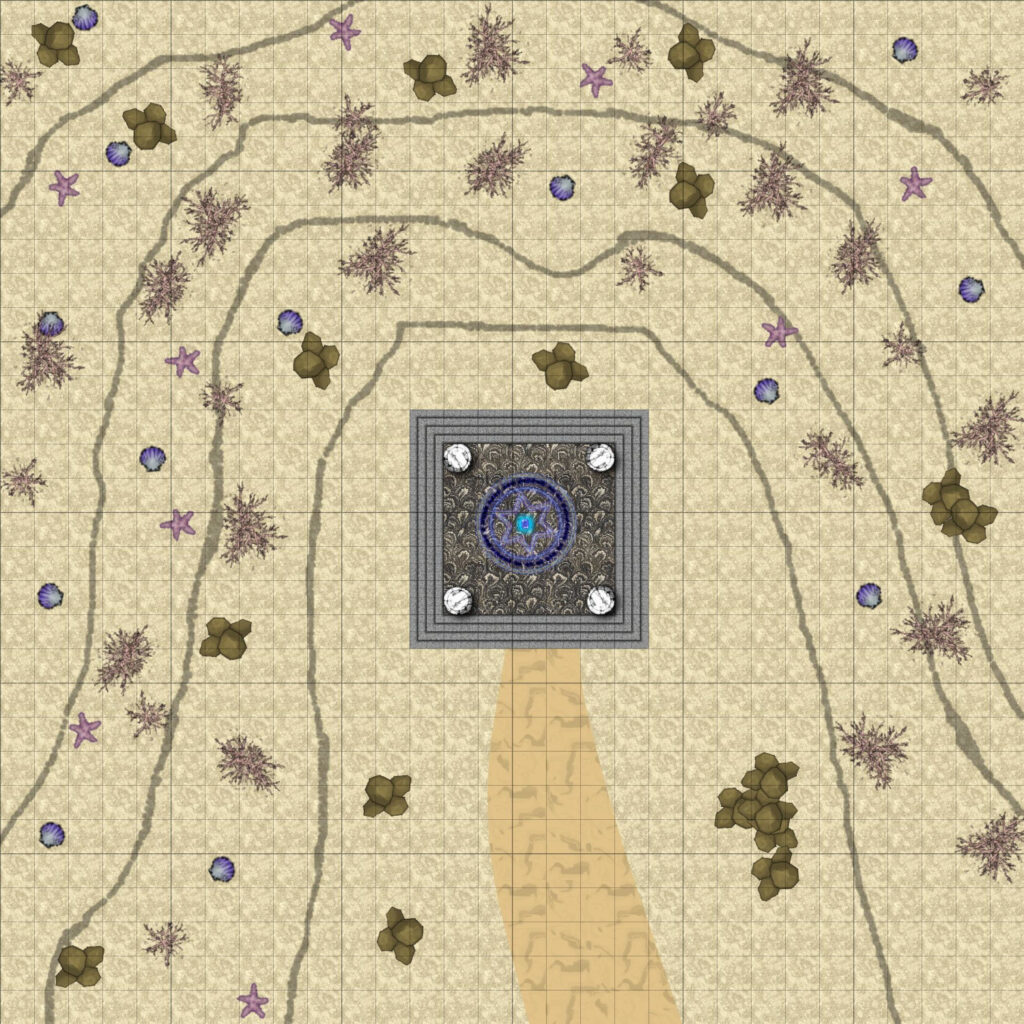
The Kraken that Odexes enslaved is guarding the crystal where his master is trapped. The mythical beast has the Trident of Domination stuck to its head, which is forcing it to follow Odexes‘ last command, which was to protect him. It has barely eaten anything for over 300 years, only feasting on the rare creature or adventuring group that was dumb enough to get close. It is therefore severely weakened, at least relatively speaking. Still, it will attack anything it sees approaching.
The enormous Kraken is easy enough to spot from any high point on Movi. Any player character who sees it can make an Animal Handling or Natural Science Skill Check. On a 7 or higher, they will see that it is starving and therefore weaker than a creature of that size should be. They still should not underestimate it, though.
The only thing holding it there is the Trident of Domination. The Kraken will immediately move towards the ocean and disappear into the deeps if the weapon is successfully removed. Any creature that is climbing the Kraken or is of the same size category or larger can attempt to pull the Trident of Domination out with an Athletics or Raw Force Skill Check. On a 9 or higher, they succeed.
If the players saw the statue of Odexes, they can attempt to fool the creature with a good enough disguise or illusion. This is, however, rather difficult and requires a Disguising or Deception Skill Check of 15 or higher. Once fooled, the Kraken will follow any order given by the imposter at least as long as they can keep fooling it. Should the trickery be discovered or the trident be removed afterward, the Kraken will stop at nothing to exact brutal revenge.
The Trident of Domination is an artifact weapon. It is a Spear, but depending on the needs of your group, it can also be a Polearm Weapon, Hallowed Blade (Physical), or Long Hallowed Blade (Physical). It has the upgrades Precise Weapon (twice) and Charming Weapon (twice). It also has the unique effect that if you hit a creature, you can decide to leave the weapon in the target and force them to make a Will DR. On a failure, it will follow all of your commands until you remove the trident.
Madow, the Foggy Swamp
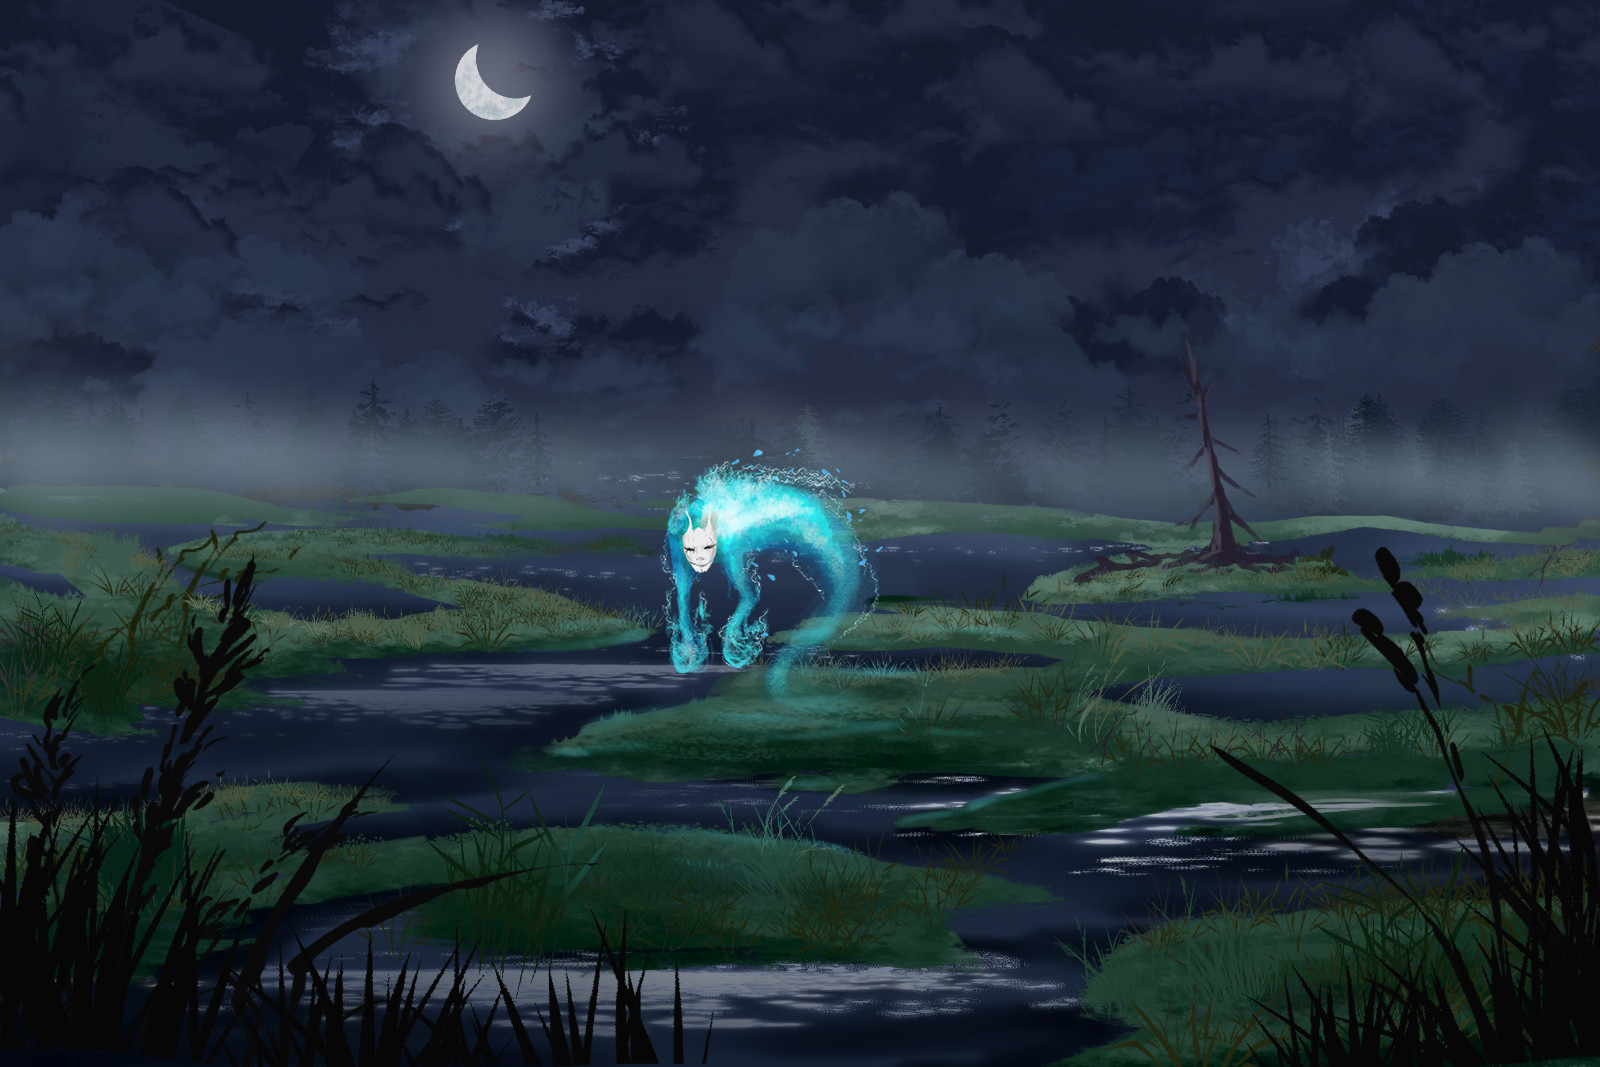
Madow is a swamp filled with a cursed fog. Evil Spirits wander around, and the foul magic of the land robs the dead of their final rest. It comes from a world with proud samurai and kami around every corner. This swamp was the hiding place of a master thief called Rinjits. He was a kappa, using all sorts of dark magic to infiltrate the houses of rich lords, stealing everything that was not nailed down. He used that magic to bind a mighty Oni to his services.
Xeldrun visited Rinjits with promises of opening doors to new worlds with riches beyond his wildest dreams. The kappa, who was no stranger to dabbling with darker magic, could not resist and took the dark bargain. The thrill of new heists quickly faded after Rinjits realized what a grave mistake it was. Xeldrun forced him to partake in more and more dangerous heists, keeping most of the reward for himself.
Rinjits wanted out and started conspiring with the four other servants. His knowledge of dark magic was very valuable in developing the ritual.
Madow, his home swamp, was already a gloomy place before being ripped out of its world, but during the ritual it was infused with the dark power of Xeldrun and Rinjits‘ magic. It is now permanently covered in a thick magical fog. Evil spirits haunt it, and the dead rise and hunt down the living.
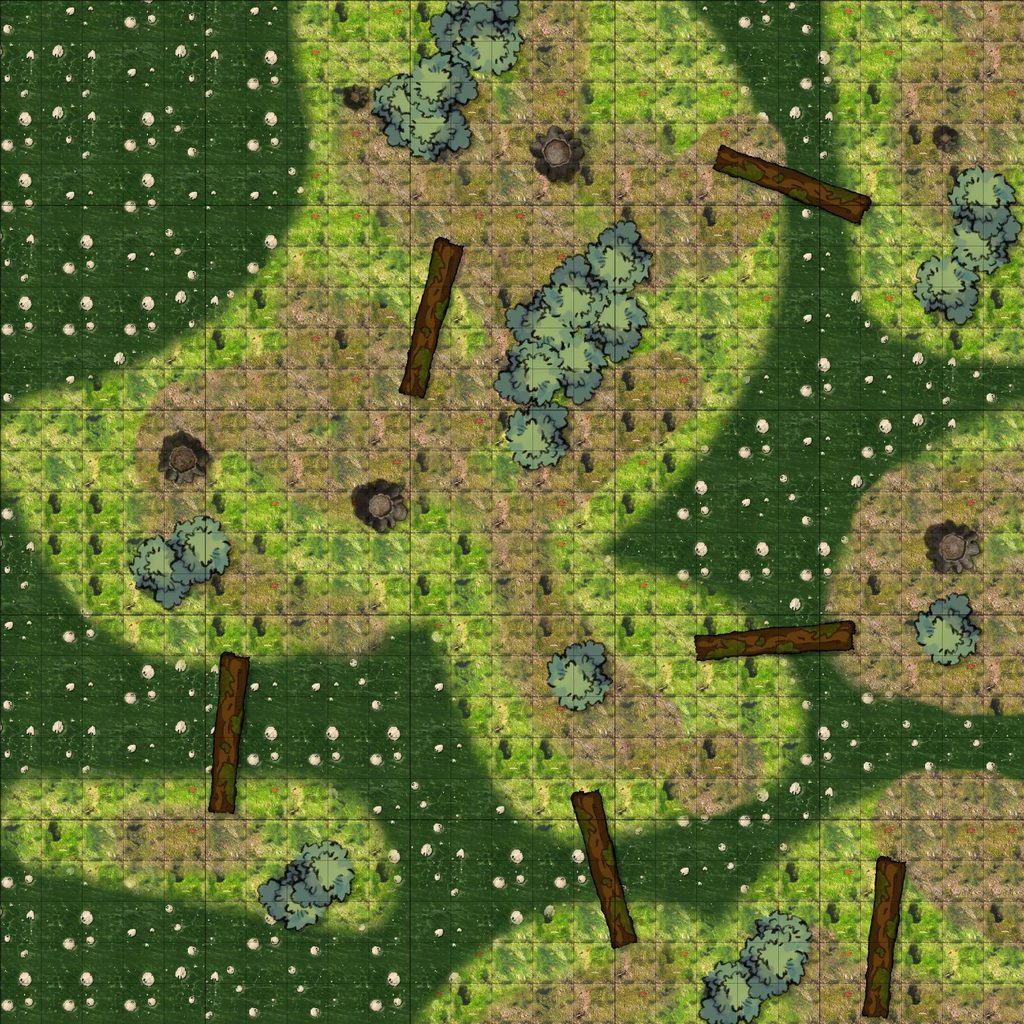
Traveling through the island’s fog requires a successful Survival Skill Check. If the leading player character rolls a 6 or less, the group will be turned around and end up at a random part of the coast after wandering for a few hours.
You can use one of these three random encounters while the group is exploring Madow:
3-6 Cursed Presences will cackle in the fog, taunting the adventurers and eventually attack them.
2-4 Zombies will rise from the swampy water and attack the group.
3-6 Skeleton Warriors wearing samurai armor will rise and attack the player characters.
Kappa Village
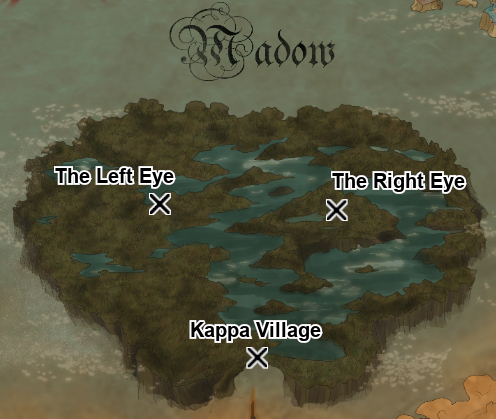
Rinjits was not the only kappa that called this Swamp home. A small village of them was ripped out of their original world, and now they are stranded in Madow. They have carved out a meager existence in the bay to the south, mostly living off fishing. The swamp does not offer many resources at the best of times, but now that it is cursed with a permanent fog and full of dangerous creatures, the villagers cannot even go out into it without risking their own lives. Because of that, the huts of the village are in constant disrepair, and they do not have much food.
The Kappa themselves are small creatures, with scaly skin, beak-like mouths, and wet, long, black hair. They have a bit of a ghastly appearance to them, but they are friendly and happy to trade. Specifically, they will offer Tier 2 Stimulants made out of potent herbs for five Rations each. They only have up to ten to sell per day. Their leader is called Mori Shigeuchi, an old but wise man, who will warn the adventurers not to go into the fog.
When asked if they know of any crystal or the Spark of Waki, they will say that they do not know of any of that, but that maybe you can find it in the hideout of the legendary thief Rinjits. Stories tell that it is hidden in the left eye of the skull. This is a reference to the whole island being shaped like a skull, even if the kappa do not know that. He and all the other kappa will be very grateful, should the players find a way to disperse the fog.
If the players want to recruit help from the village, a young warrior called Jumi will volunteer, but she will ask for five rations in advance and enough food and water to survive every day. She will start off as a small Level 1 Nature Cultist with Tier 0 items and level up whenever the players level up.
The Right Eye
Long ago, a lord sent a group of samurai to hunt down Rinjits and the Oni that served him. They were led by the honorable Namajoca, who wielded a katana blessed by a mighty kami. The magic of the sword pushed back against the dark magic of the swamp, but when Rinjits sent his Oni to deal with the problem, the other samurai fled in fear of the hulking monster. Namajoca faced it alone, but perished in the fight. The other samurai did not fare better, as they were all killed one by one.
Rinjits put up a magical seal that kept the cleansing effect of the katana at bay and left Namajoca‘s corpse to rot. The other samurai, ashamed that they left their master alone when facing the Oni, could not rest in death, and now their spirits stay with Namajoca, protecting him and his weapon from any unworthy soul.
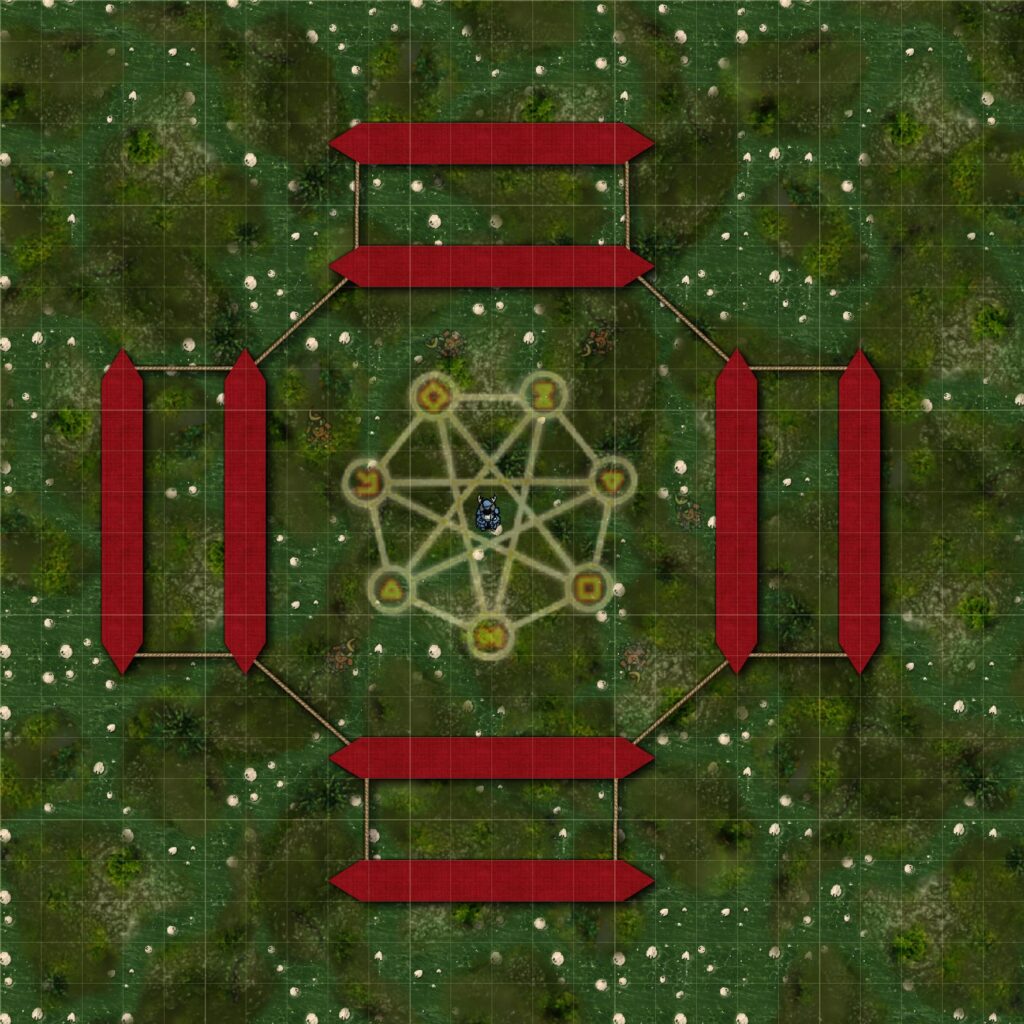
The place is surrounded by eight red shinto gates that are part of the magical seal. They are easy enough to spot from afar if the players have dealt with the fog. The players can also stumble upon it before that if they roughly search the area where it is located.
The 4-8 Honor Bound Warrior Souls are willing to talk and will warn the adventurers to leave their master alone. If the players get closer anyway, they will immediately attack. The samurai freely share the story of Namajoca and their shame and will warn the players of the monster in the east. They will be confused if the players say that they are on an island and vehemently claim that they are on a continent, since they have never seen the coast after Medow was pulled into this world.
If the group tells them that they want to kill the monster, they can try to convince the ghosts with a Presence or Menace Skill Check to give them their master’s armor and weapons. On an 8 or higher, they will allow this. Should the players already have killed the Oni and show proof of that, the Samurai will declare the players worthy and allow them to take the items without needing further convincing. Afterward, they will rest in peace and disappear.
The katana is an artifact weapon with the upgrades Critical Weapon and Deathblow Weapon (twice). It has the additional effect of pushing back the fog, preventing any random encounters on Medow. It can be a One-Handed Sword, Two-Handed Sword, Hallowed Blade (Spirit), or Long Hallowed Blade (Spirit). Namajoca also has a Composite Bow, Longbow, or Shortbow with Precise Weapon (three times) and medium or heavy armor with Lighter Armor and Extra Armor (twice).
The Left Eye
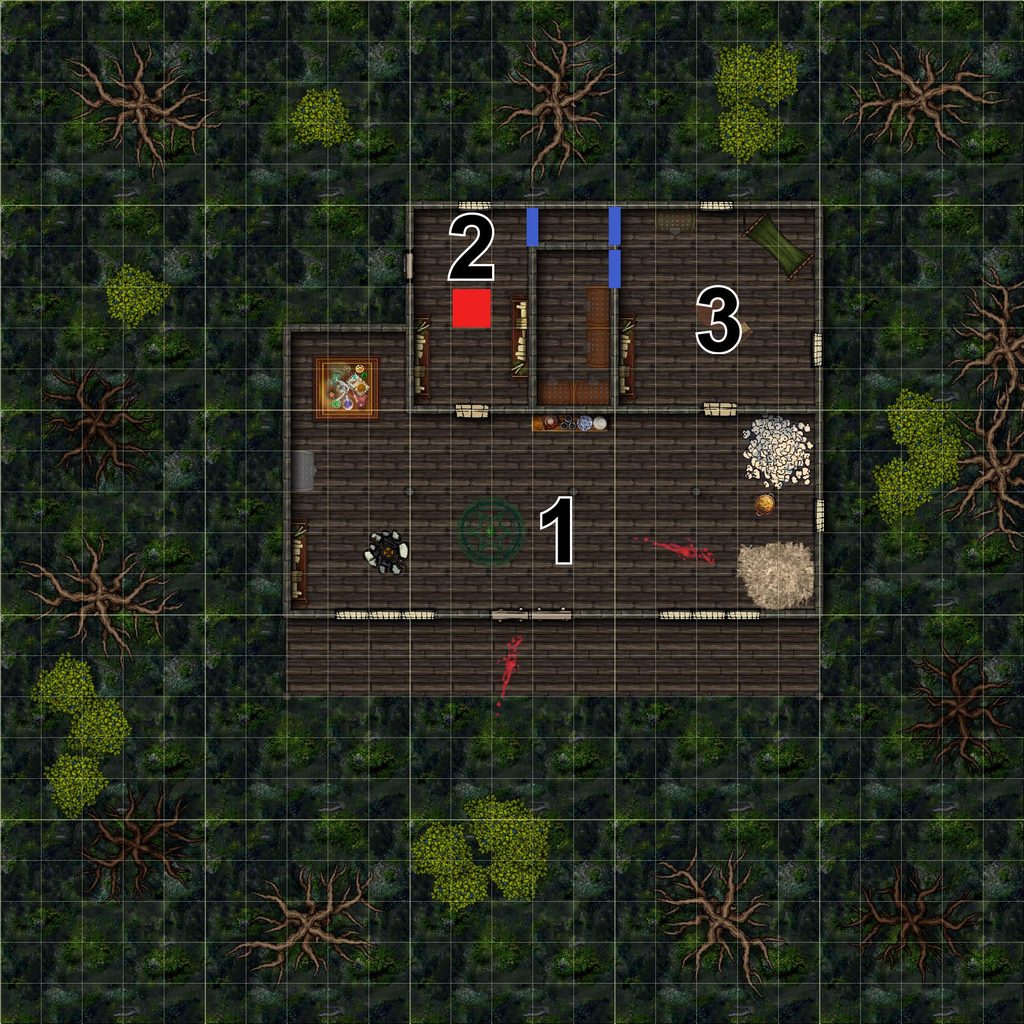
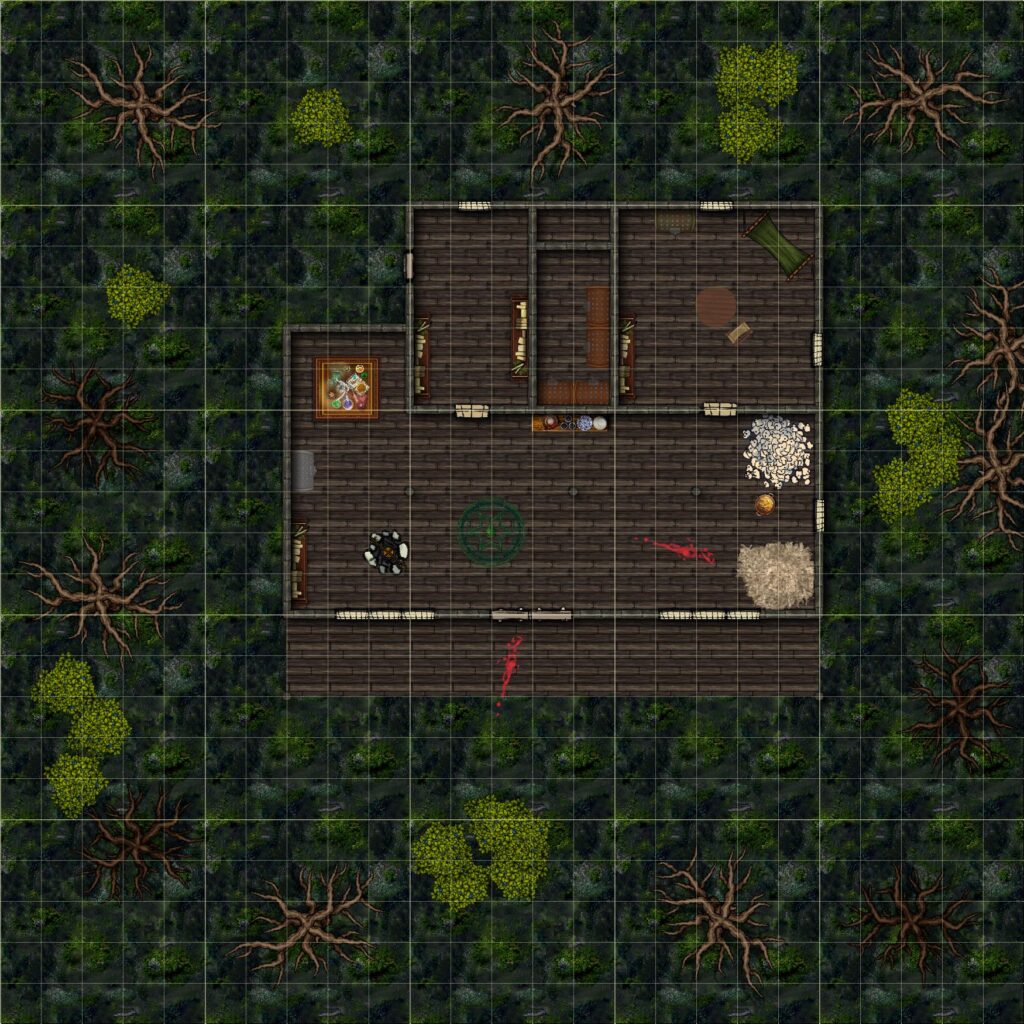
This is Rinjits‘ hideout, a suprisngly fancy looking house in the middle of nowhere. The only one living here is the Oni Jokuza, whom Rinjits bound to himself with dark magic. Jokuza is forced to protect his master, who now is one of the five crystals needed to open the way to the spark of Waki. He is a large, bulky creature, with red skin, fangs, and a giant club, but his brutish appearance hides a surprising cunning and magical might. He will stay mostly in Room 1.
Room 1: Rinjits‘ crystal can be found here floating in a magical circle. It is of a sickly dark green color. On the right side, there is a pile of hay that Jokuza uses to rest and a pile of bones of all the intruders that he has killed. On the left side is an alchemical crafting table (Expensive Supernatural Crafting Station), a cooking pot, and some scrolls with old magic. A player with a Supernatural Skill Check roll of 7 or higher can find 3 Ability Consumables (4 WP) of the Ability Lesser Invisibility.
Room 2: This room has a back entrance and is booby-trapped. Anyone stepping on the central space will have to roll an Instinct DR against 15. On a failure, they receive 4d8 Physical damage from spikes that shoot down from above. This will cause a lot of noise and draw the attention of Jokuza. The bookshelves on the side contain maps and plans for buildings that Rinjits has stolen from in the past. Anyone looking through these scrolls has to roll an Analysis or History Skill Check. On a 7 or higher, they will find maps of the region that clearly show Madow being part of a continent and not an island. This is, of course, because the maps are from before the ritual was cast. There is a hidden door in the upper right corner that leads to room 3. If the players search the room, let them roll a Perception or Engineering Skill Check. On an 8 or higher, they find the door. Should the players actively choose to search that corner of the room for a secret door, let them find it automatically.
Room 3: Rinjits‘ old bedroom. There is a hammock in the corner, a table in the center, and some chests and shelves mostly just containing clothes. There are two hidden doors on the left. If the players search the room, let them roll a Perception or Engineering Skill Check. On an 8 or higher, they find both doors. Should the players actively choose to search that corner of the room for a secret door, let them find it automatically. The right door leads to room 2 and was used to quickly escape if necessary. The left door leads to Rinjits‘ old treasure. A total of 5,000 Credits worth of coins and other valuables per player.
The Ancient Oni Jokuza will be vigilant and see the player group unless they approach stealthily. He will immediately use Lesser Invisibility on himself and try to ambush the player characters. The invisibility gives him advantage on Stealth Skill Checks unless one of the players has a Vision that could spot him, like Supernatural Vision or Life Vision. If the players spot him before they attack him and try to speak with him, he will be willing to answer, but stay invisible.
Jokuza is bound to his last order, being to protect Rinjits and his belongings. The Oni has a burning hatred for his master and is more than willing to abuse loopholes to not do his bidding. He also wants to be free of his enslavment. Jokuza will become visible and let the adventurers in if they promise not to steal or break anything. He still thinks that he is in his old world and will be very confused if the group tells him that he is on an island. Should the player already know that Madow used to be a fragment from another world and tell Jokuza, he will become incredibly enraged, going outside and destroying trees with his club in frustration.
Jokuza knows pretty much everything about his older master and is willing to share what he knows if the players stay polite and do not annoy him. He also knows that the players need to bring together all the crystals to free his master, allowing him to truly die. This is the only way for Jokuza to become free. If the players are willing to do this, Jokuza will let them take the crystal, as one could interpret that as “protecting his master”.
Taking the crystal will break some of the dark magic of Madow. The fog will slowly retreat over the next few hours, and the spirits and undead will vanish with time.
If the players kill the Oni, they can use his Equipment. It has the upgrades Colossal item, Vitality Boost, Willpower Boost, and Defense Breaker.
Merah, the Elemental Wasteland
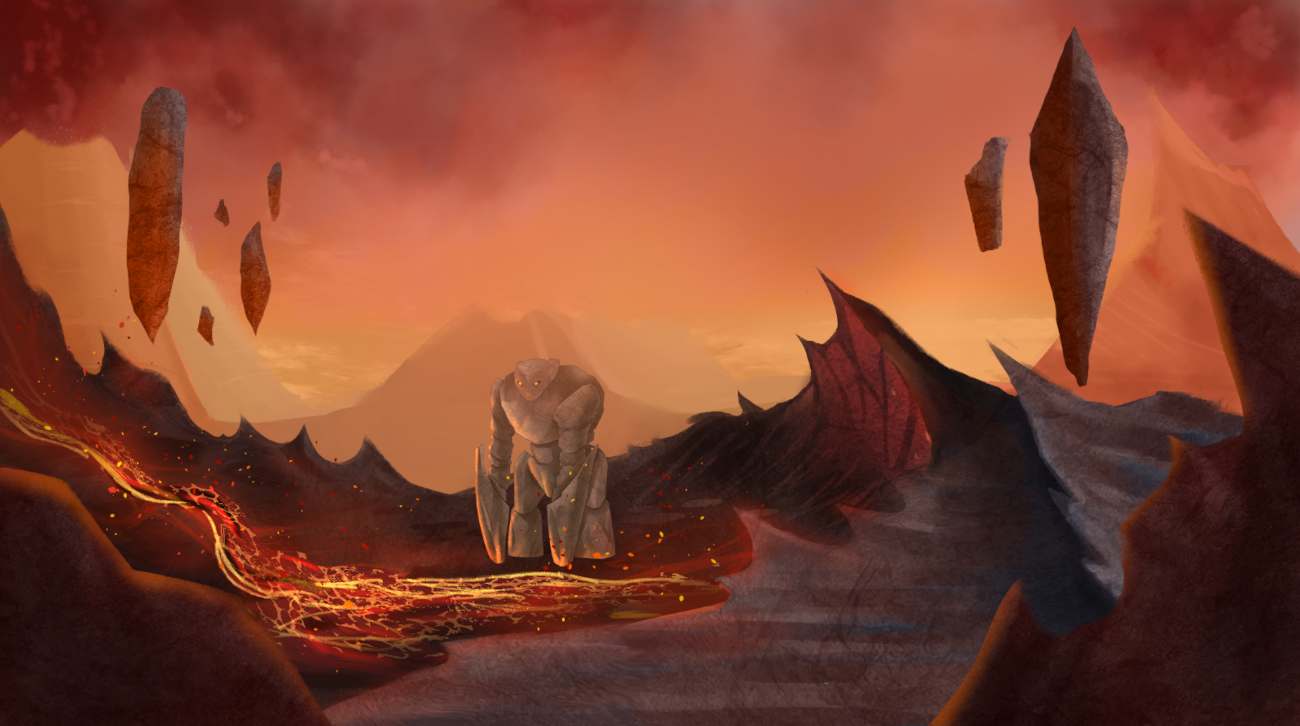
Merah comes from a world overflowing with elemental energy. It is covered with volcanoes that constantly shower the island with ash. Lava flows as rivers do in other places, and large rocks float in the air. Almost no biological life is found on the island. Instead, it is mostly inhabited by elementals.
In these harsh lands lived the small goblin Jupjup. He was brave, friendly, but also not necessarily the brightest. He loved collecting all sorts of random objects. One day he found the spirit of the land, a mighty dragon made out of rock and lava. Undeterred by the fearsome appearance, he befriended the spirit, who quickly learned to appreciate the friendly creature. Since the dragon did not have a name, Jupjup called it Sparky.
Xeldrun, seeing a potential disposable pawn in Jupjup, managed to trick him into accepting his bargain. The poor, innocent goblin did not even consider that the dark, shadowy figure in front of him could mean him any harm and accepted. When he told Sparky, the old spirit quickly realized his friend’s mistake, but it was too late. Jupjup tried to make the best of it and started collecting all sorts of weird objects from all over the multiverse while serving Xeldrun, reserving the shiniest for Sparky.
When the other four started plotting a way out, Jupjup immediately joined in, as he also considered them to be his friend. His skills in finding random things were surprisingly useful for the preparations of the ritual.
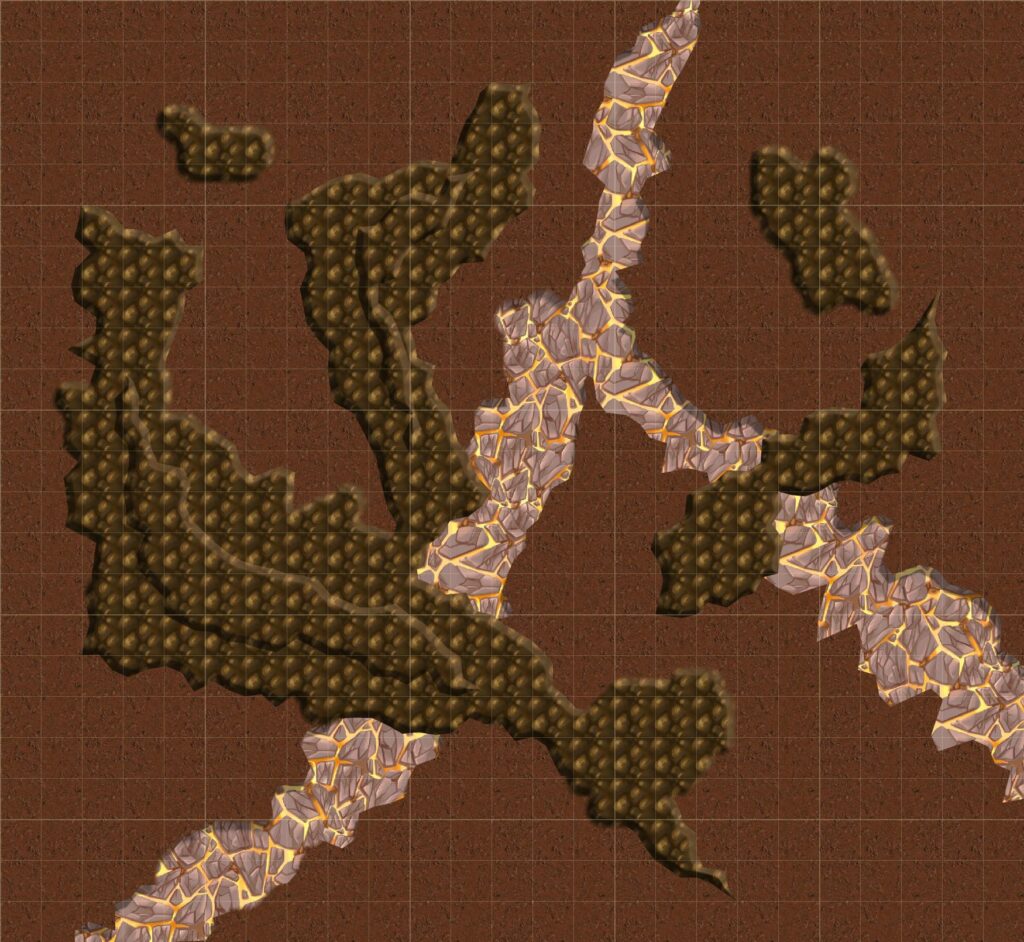
The island’s air is hard to breathe because of all the ash in it. Anybody who goes deeper into the island and does not have some sort of environmental protection needs to roll an Endurance Skill Check. On a 6 or lower, the creature becomes Tainted until they leave the island. Something as simple as putting some cloth over your mouth can grant the adventurer advantage on that check.
Here are some random Encounters for Merah:
A wandering Greater Earth Elemental attacks the group.
A Greater Fire Elemental tries to burn the adventurers down.
A depressed Tempest Giant called Omex sits on the ground looking towards the ocean. If approached peacefully, she will talk about how she got separated hundreds of years ago from her tribe, when suddenly the land around Merah disappeared while she was there. She does not know why it happened.
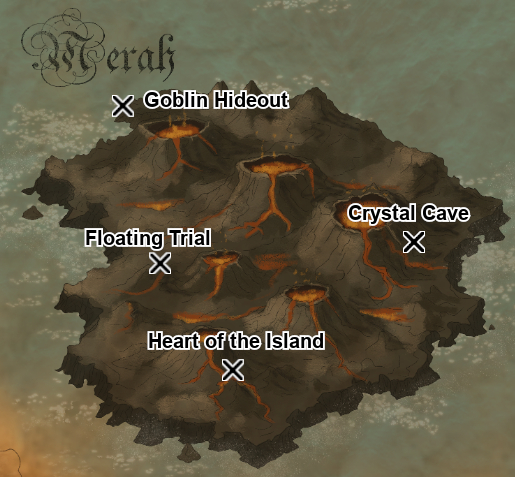
Goblin Hideout
On the northwest coast of Merah lies a small village of goblins. They inhabit small stone huts and mostly live off the sea. Their love for “shinies” drives them often deeper into the dangerous but extremely mineral-rich island. But if there is one thing they love more than anything, it is fruit or “jucy” as they call it. Merah has basically no plant life, making fruit extremely rare and only occasionally being blown over by storms from Berdea.
If the players approach, the goblins will be very curious, swarm them, and try to touch all their stuff. They have no hostilities towards the party and are generally friendly, even if they may not understand boundaries. They will quickly start asking if the adventurers have “jucy”, making hand signs that form spheres, and pretending to eat them to communicate their desires. If the players show any indication that they might have fruit, the goblins will start offering them “shines”, which are extremely valuable crystals and gems. 1000 Credits worth of crystals per fruit, to be precise. Should the crew of the Coconut hear of this, they will trade away all of their fruit, reducing their food supplies counter by an entire day.
If the player group starts asking for a special crystal, the goblins will not know what they are talking about, but they will tell them that the heart of the island might know it. They will say that it lives in the biggest volcano in the south of the island. They are referring to Sparky, who is indeed the embodiment of the island. The goblins speak of him as a god and only rarely approach it, especially since they live on the other side of the island.
If asked for general guidance, one goblin will step forward, called Glublub. He considers himself to be the bravest of all the goblins in the village and is willing to help them for one “juicy” per day. Glublub knows all explorable locations and will lead the player group to them if asked. He will start off as a Level 1 Goblin Warrior with Tier 0 items and level up whenever the players level up.
Crystal Cave
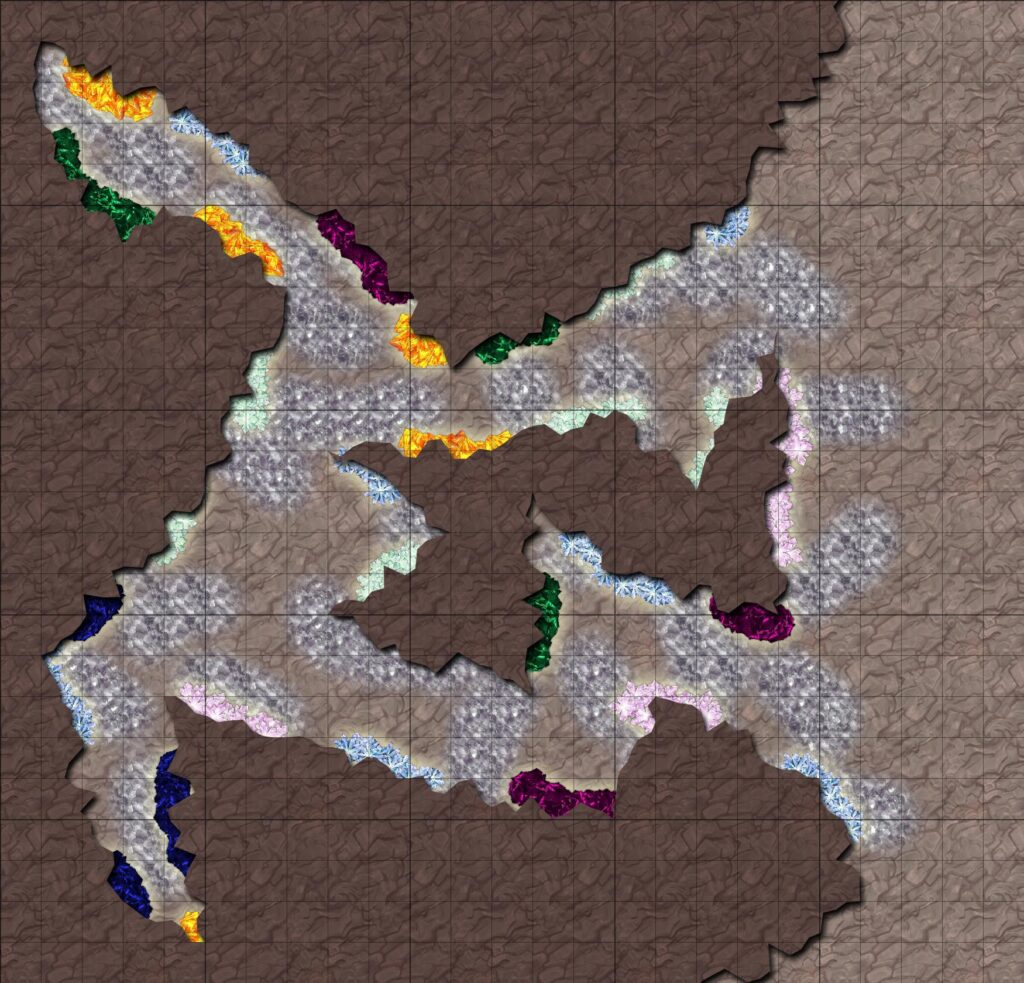
On the east side of the volcanoes lies a cave that is filled to the brim with magical crystals of all colors. The gems are so shiny that they can be seen from the coast even through the ashy air. This place counts as a high-value harvesting area for materials for Art, Engineering, Natural Science, and Supernatural. You can also allow it to be used for other crafting skills if the player can explain why it would make sense. Raw Force, Engineering, Natural Science, and Supernatural can be used to harvest materials here.
The cave is, however, not uninhabitable. 2-4 Crystal Elementals hide within the crystal formations and will attack the adventurers on sight.
The Floating Trial
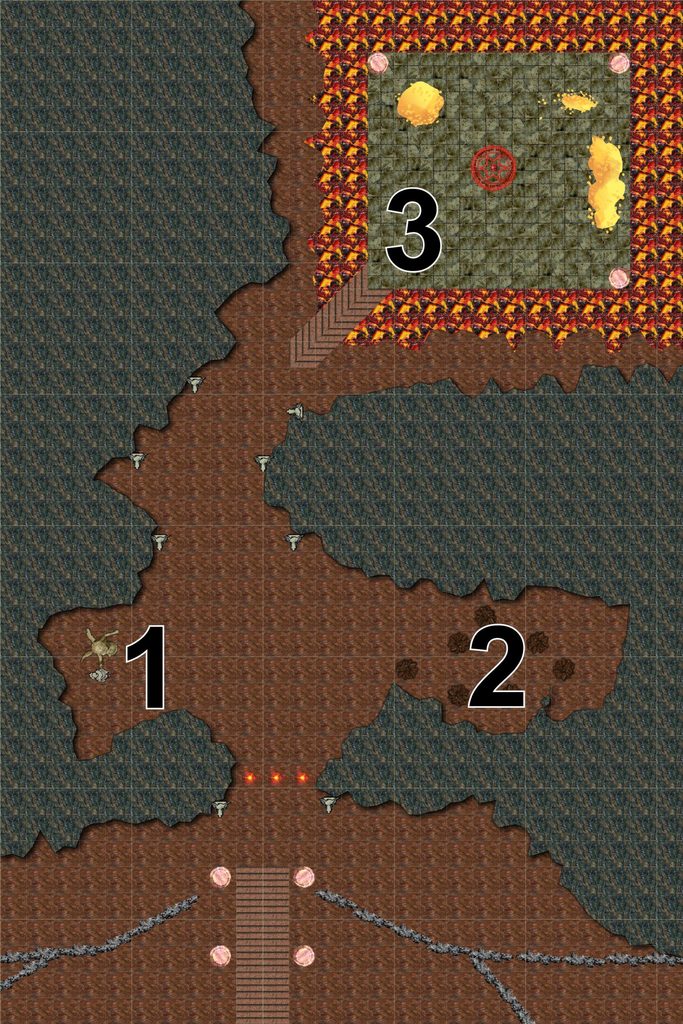
This old ruin that lies on the west side of the island was built by the goblins a long time ago. It was a proving ground to see if you were worthy of meeting the spirit of the land. The goblins have long forgotten its purpose, but they know it is still there.
It is built on a floating rock. The bold red and golden colors it once had have faded over the centuries, but it still has a majestic atmosphere. Many depictions of the spirit of the land adorn the walls, showing a dragon made out of cracked rock and lava. It contains four trials.
The first trial is getting up to the temple in the first place. There are “stairs,” but they are broken apart and floating around. At the ground level is a slab with an engraving. It says, “Show me your devotion.” Player characters can attempt to jump up the stairs with an Athletics or Nimbleness Skill Check. On a 7 or higher, they succeed.
Next up is the closed stone door. It says, “Show me your strength.” A simple Raw Force check against 4 opens the door. It is not that heavy since it was built for goblins.
After opening the doors, they will see a wall of fire and a slab saying, “Show me your Perseverance”. Walking through it deals 2d8 Heat damage. Jumping or running through it deals 1d8 Heat damage. It is very much intended for the participant to endure the pain and just run through it.
Finally, the back part of the proving grounds seems to be floating roughly 10 m away from where the characters should be standing. Also visible from afar are some pristine red robes, a magic stave, and a weapon decorated with red gems. On the ground, it says “Show me your Faith”. There is an invisible bridge that leads over the chasm. The players can, of course, try to cheat the whole trial, be it by flying up some way or getting creative and just entering from the back.
The robes are Clothes with the upgrades Defense Matrix (twice) and Elemental Status Armor (Burning, twice). The magic stave is an Equipment with the upgrades Willpower Boost (twice) and Elemental Status Equipment (Burning, twice). The weapon is a weapon of your choice that fits well with the party, with the upgrades Improved Weapon, Precise Weapon, and Elemental Status Weapon (Burning, twice).
The Heart of the Island
In the south of Merah, in the biggest volcano, rests the heart of the island, or Sparky as Jupjup called it. This dragon-shaped elemental spirit is a manifestation of the land itself and was worshipped as a god. But as Merah was ripped out of its universe, this severely weakened Sparky. It now spends most of its time resting next to the crystal that holds the soul of its old goblin friend, Jupjup.
Sparky knows the full story of what happened with the five and Xeldrun and wishes to free Jupjup, but as a manifestation of the land, it is bound to Merah and cannot leave the island. So it stays here in the old temple built to worship it, waiting for someone who could help it to arrive.
The Temple is easy enough to spot from the south coast. It draws attention by being in the biggest volcano and through the stairs leading up to it. Just following the stairs will lead to the entrance.
The entrance that is built into the side of the volcano is blocked by a magical energy field. If somebody approaches, a magical booming voice will say, “Give a worthy offering,” and the mouths of two stone dragon heads on the left and right of the entrance will open up.
If anything worth at least 100 Credits is put in one of the dragon mouths, they will close, and the offering will disappear. Then a voice will say, “You may enter,” and the way inside will open. If it is over 1000 Credits worth, the voice will instead say, “A truly worthy offering.” If it is worth less, the voice will say, “You are not worthy to enter,” and the energy field will not disappear. The offering, however, will. The player characters can also try to blast through the entrance. Treat it like it is made out of energy (100 Vitality, regains half Vitality per round) if they try.
Once the players enter, they will hear the snoring of a massive creature. This is the heart of the island that is sleeping. Any loud noises will wake it up. Glublub will refuse to enter if he is traveling with the party because of his respect and fear of what he perceives to be a god. He needs to be bribed with extra fruit or shinies to overcome his fear or convinced in another way.
Room 1: A finely crafted stone statue of the heart of the island stands in this corner of the cave. It shows the dragon in an imposing position. Right next to it is a crudely hammered statue of Jupjup holding one of Sparky‘s claws. The first statue was crafted by the original makers of this temple, while the second one was made by Jupjup to celebrate his friendship with Sparky. The back of the wall shows many almost childlike drawings, showing Jupjup playing with Sparky and giving it gifts.
Room 2: This part of the cave has piles upon piles of random junk from all over the multiverse. Stuff like socks, toys, cooking utensils, clocks, and so much more. Most of it is of no use for the adventurers. Anybody investigating it can roll an Analysis or History Skill Check. On a 5 or higher, they will realize that these objects do not come from the same cultures. On an 11 or higher, they will realize that these things are so different that they must be coming from completely different worlds. Anybody searching through the piles can roll a Luck or Perception Skill Check. On a 7 or higher, they will find a magic wand. This is an Ability Item of Elemental Explosion (Heat) with the four Extra Charges upgrades.
Room 3: This is the main chamber of the Temple. A large stone structure was built on top of the natural lava of the volcano. A stair leads from the natural cave to this structure. All the offerings given to the dragon heads at the entrance are automatically teleported here. Huge piles of treasure have gathered here over centuries. A total of 10.000 Credits per player, to be exact. In the middle, you can see a red floating crystal in a magic circle. This is one of the five crystals needed to reveal the Spark of Waki, and it contains Jupjup‘s soul. The most noticeable thing is however the heart of the island sleeping right in front of the crystal. It has the form of a giant dragon, made out of cracked stone, lava glowing from those cracks.
Should the player characters approach with respect and wake it up, it will be willing to talk. If asked for a name, it will say that it does not really have a name but an old friend called him Sparky. It will tell them everything it knows if they show themselves to be good of heart and promise to free Jupjup. Should they not convince the heart of the island that they are trustworthy, it will command them to leave or even attack if they seem especially wicked.
The dragon is easy enough to attack in its sleep, causing the players to surprise it, but this will prevent them from being able to talk it down in any way.
The players can also try to sneak by and steal the crystal while the heart is sleeping. It has disadvantage on Perception Skill Checks while it is sleeping. Should it wake up and see them, it will do everything to protect its friend and attack without mercy. The dragon wakes up after a few minutes and notices Jupjup is gone if the players succeed and get out of the cave with the crystal. This will cause it to enter an enraged state. Since it is a manifestation of the land, all volcanoes will start to violently erupt, and the earth will start to tremor and crack. The party will need to run as fast as they can back to the ship, trying to survive the earth itself turning against them. Make them all roll an Athletics or Nimbleness Skill Check. On a 6 or lower, they will receive 2d6 Heat and 2d6 Physical damage as rocks and lava hit them. Should they roll a critical failure, they will fall into the earth that is opening up, and unless the party acts quickly to save them somehow, they might be lost forever.
Soon afterward, the heart of the island will rise and search for the crystal. If the party has not left Merah by now, they will be attacked. Once they reach a safe distance, they will be able to see from afar how the dragon will start flying around, searching in vain, as the island is covered in lava and ash. But as it is bound to the land, it cannot leave the island. Merah will be pretty much destroyed after this. All explorable locations will be lost in the destruction, including the goblin tribe. If Glublub is still with the party, he will be sad and enraged at the same time, attacking the party to get his revenge.
Berdea, the Augmented Forest
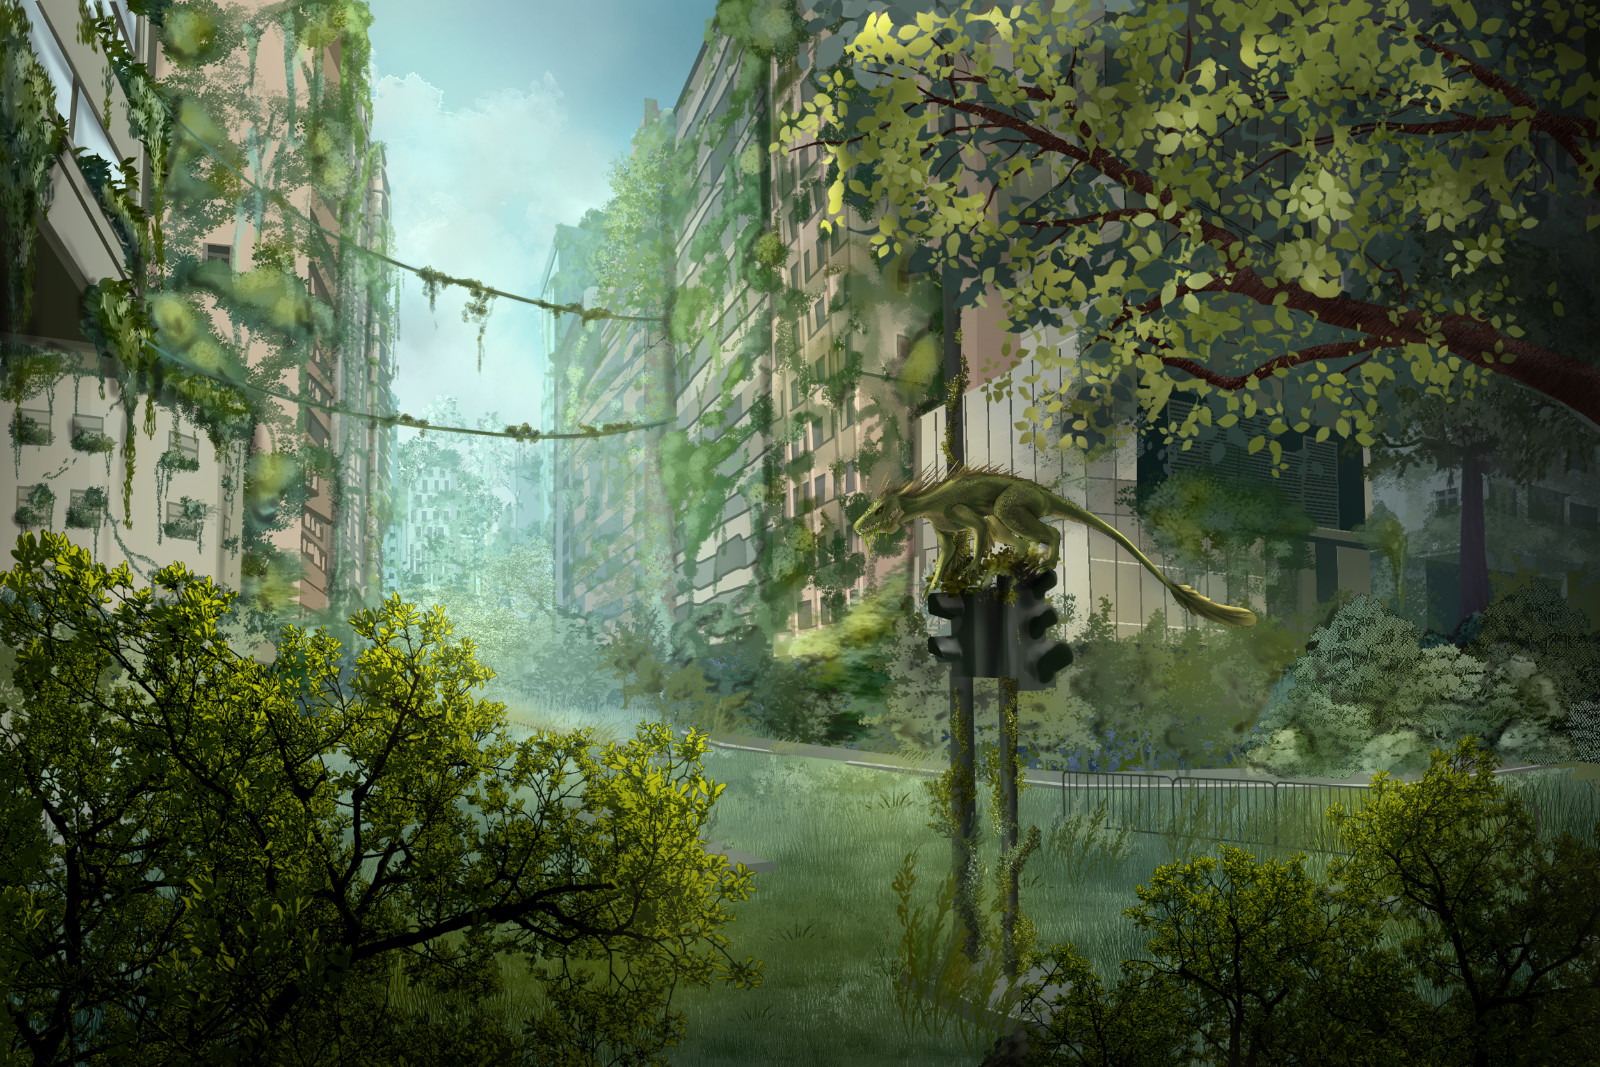
Berdea is an island of contradictions. Ruins of very advanced buildings point to this once being a futuristic land, but wild plants and large trees have taken over and broken down most of the old infrastructure. Savage dinosaurs roam the land, but none of them seem natural, as all the wildlife in the west is mechanically enhanced, while the animals of the east are heavily mutated.
This is the result of two warring tribes of saurians being ripped from their home world. Two ideologies on how to build the future clash: the Voltun striving to enhance the flesh with machines, while the Crenzecan want to push nature through artificial evolution. Cut off from the rest of their civilization, they have kept up the war by forcing their ways on the wildlife and using them as living weapons.
But before all that happened, one member of each tribe fell in love. Knowing that they would never be accepted, they fled to make their own home hidden in a giant tree. Together they had a child named Cozal. They combined the science of both their tribes to build a guardian for their home and daughter, a mutated and cybernetically enhanced Tyrannosaurus Rex. This mighty beast kept them safe, but one day, when the two parents went out to gather supplies, they were caught and killed. The young Cozal was left behind in the tree, slowly starving and not knowing what to do.
Xeldrun took advantage of this situation and offered to save the little girl in exchange for her soul and services. Not understanding what she was getting herself into, she accepted in her desperation and naivete. She was then forced to use her parents’ machinery to create monsters for the demon.
Jupjup felt bad for the little girl and took her under his wing. That is how she got involved with the other four. The knowledge she gained from what her parents left behind helped them with finding a solution.
You can have different random encounters depending on where the party is on the island.
If the players are exploring the western side of the island in Vultrun Territory, one of these two encounters can appear:
2-3 Cyborg Triceratops storm the party.
One Cyborg Carnotaurus tries to electrocute them with its enhanced horns.
If the players are exploring the eastern side of the island in Crenzecan Territory, one of these two encounters can appear:
4-6 Mutated Raptors swarm the party.
2-3 Mutated Parasaurolophus will attack them.
Warring Tribes
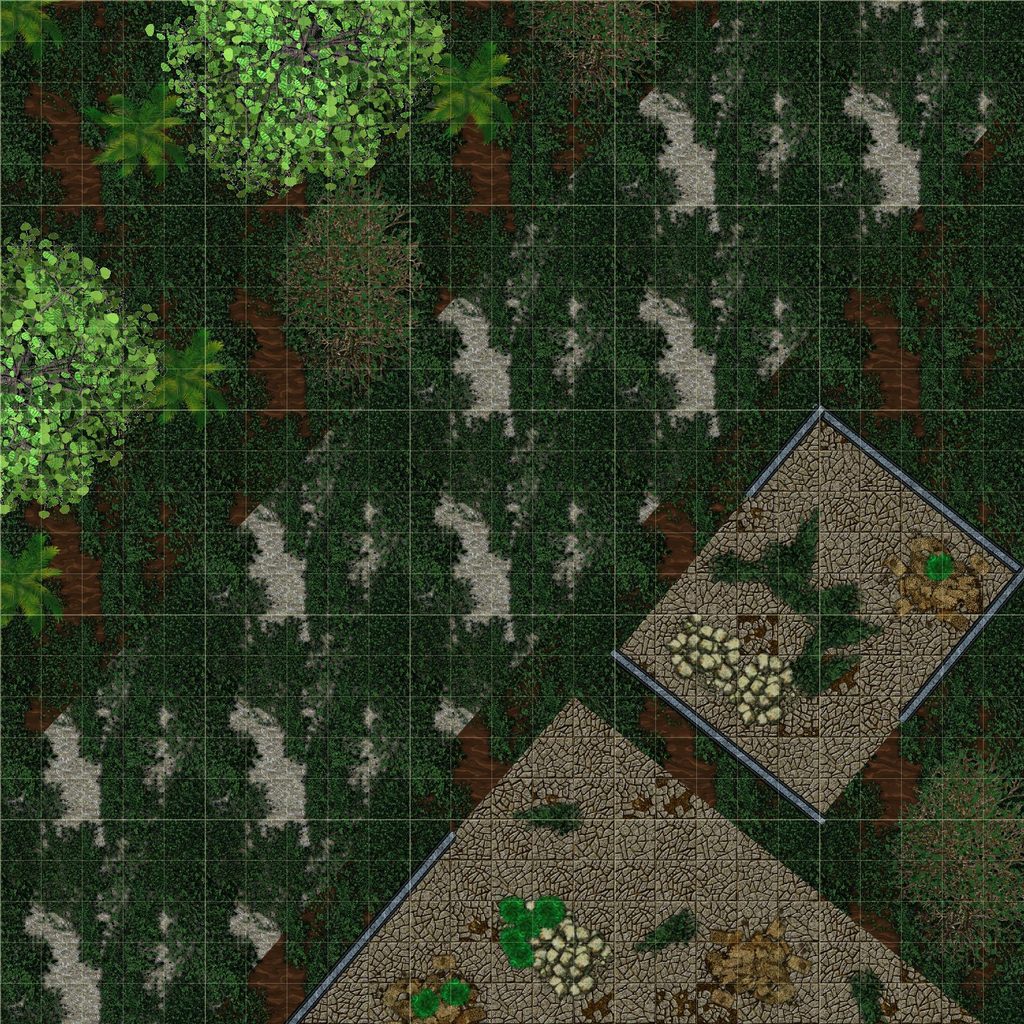
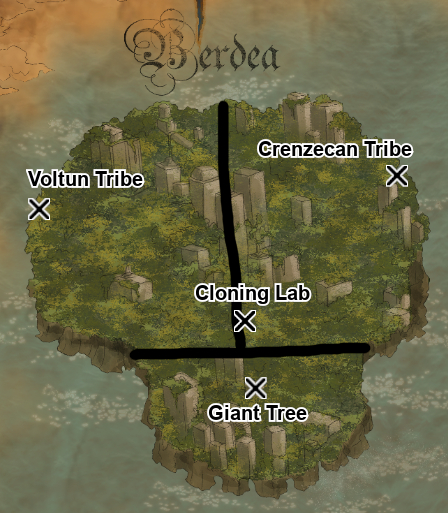
The Voltun live on the west coast of Berdea, while the Crenzecan live on the east coast. Both tribes were at war when Berdea was sucked into this world, and they have been continuing this conflict to this very day. They both believe that the other side created a superweapon that backfired and destroyed the rest of the world. They have been stuck in a stalemate for hundreds of years, sending modified dinosaurs to fight on their behalf.
Yet they have a surprising amount in common to a degree that the interaction with them is nigh identical. The main difference is that almost all Voltun are cybernetically enhanced in some way, while most of the Crenzecan have mutated themselves in controlled ways. The leader of the Voltun is Wirkun, an older saurian who replaced all his limbs and tends to be more reserved. The leader of the Crenzecan is Zarthecra. She has massively increased muscle mass, towering over the others with an impressive size of 3 meters. She also tends to be more hotheaded.
But those are almost the only differences. Both live in villages that have been mostly cobbled together from what they could scavenge in the ruins. They have built walls to defend against attacks. Saurians themselves are large humanoids with raptor-like features and tails.
They will react curiously when approached and be friendly toward outsiders as long as the party does not claim allegiance to the other tribe. The respective leaders will come to greet them respectfully and are more than willing to warn them of the other “evil” tribe and their horrible sciences. After all, only their own way is the correct and humane one for enhancing life. They will not be willing to share their technology unless the party proves themselves to be highly valuable and trusted allies.
They will also warn of a dangerous beast roaming the southern part of the island. They do not know what it is exactly, but no scout who had seen it and came back alive. This is the mutated cyborg T-Rex that roams around the giant tree.
If asked about a crystal, they will say that they have not heard of it and suggest that the other tribe stole it.
The leader will also ask for resources to maintain their machines. 1000 Credits worth of Engineering or Natural Science crafting materials, to be exact. They are willing to allow safe passage through their lands in exchange. This effectively means giving them a small device that emits a signal or pheromones, respectively, and keeps their corresponding enhanced dinosaurs from attacking the party.
The player characters can attempt to broker peace between the two tribes. The leaders will only be willing to meet up on neutral ground (the coconut, for example) if the player characters succeed on a Persuasion or Presence Skill Check. They will need to roll at least a 10, but it will be lowered by 2 if they have traded with the tribe and by an additional 2 if the party has proof that they have slain the beast of the south.
Once the two leaders meet, the player characters will need to do their best to mediate the talks. Let them roll a Persuasion, Psychology, or Presence Skill Check. On a 10 or higher, they will be able to talk both sides down over the course of an hour to agree to a ceasefire for now and to open up communications between the tribes. The need to only roll an 8 if they have defeated the mutated cyborg T-Rex. On a failure, the leaders will both swear to continue the hostilities, blaming each other. Successfully brokering peace between the two warring tribes counts as a leveling milestone.
Cloning Lab
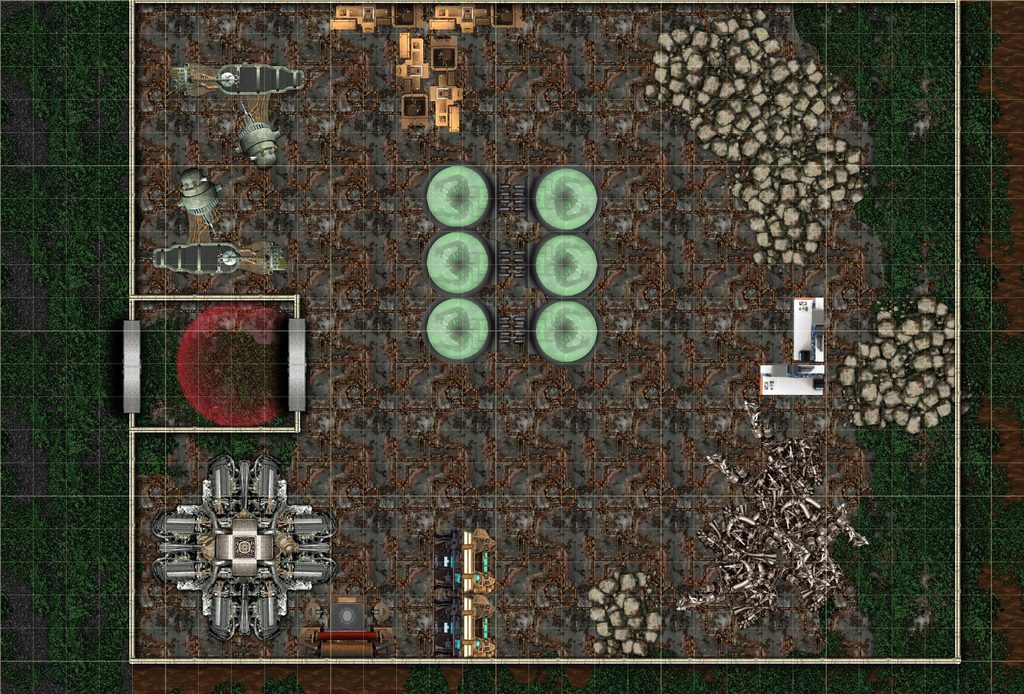
Should the party wander around the center of the island, they might notice that one of the old buildings still has power. Lights flicker at its entrance. This old metal building has no windows and seems to be more robustly built than most of the other ruins. It is a very old Crezecan lab in which they were working on all sorts of prototypes and experiments.
It might be one of the very few buildings that have not been destroyed and scavenged for parts, but the technology is still old and malfunctioning. The doors can be opened with a Raw Force Skill Check against 6 or a Computer, Lockpicking or Engineering Skill Check against 7.
Should the party enter through the main (and only) entrance, an old DNA identification scanner will be activated, which they will notice as a red light that encompasses the entire entrance. It will not find them in its database and will activate the security system. This will trigger the cloning pods in the center of the building to create hostile clones of the party, but since the tech is barely holding on, they will come out as Malformed Clones. They are recognizable as clones, but heavily malformed and barely capable of speech.
Much has broken down and rusted over the years, but there are still 5,000 Credits worth of spare parts that can be used for Engineering and Natural Science crafting, as well as a collection of item prototypes. I suggest picking 3-5 items of Tier 3 that your player characters can use, but with the downgrade Unreliable Ability, Unreliable Weapon, or Stiff Joints, since these are old prototypes. Here are some suggestions:
- A weapon with Elemental Status Weapon (Poisoned, four times)
- An Equipment with Accelerator (twice) and Speed Up (twice)
- An armor with Fly Equipment and Speed Up.
- An Equipment with Narrative Momentum Boost (four times)
- A shield with no downgrade and Placeable Shield (twice) and Expandable Cover.
- A weapon with Elemental Switch, Exploiter Weapon (twice), and Improved Weapon.
- An armor with Backlash Armor (four times).
Giant Tree
The giant tree towers over the rest of the forest and is easy enough to see from the coast. The southern part of Berdea is almost completely devoid of any animal life, as the Mutated Cyborg T-Rex devours anything that dares enter its territory. Let the player with the highest Survival or Natural Science Skill roll if the group sets foot on this part of the island. On a 7 or higher, they will notice that the forest is eerily quiet and that there is no sign of any animal. Even the insects seem to be missing.
The forest itself will be filled with notable destruction. Trees have been knocked over here and there, and huge bite marks will be found on tree trunks. In the absence of animals, the enhanced stomach of the beast can turn even trees into nutrients. Its pain-filled roars can occasionally be heard in the distance.
Unlike the other guardians, the mutated cyborg T-Rex patrols the area. Have the players roll a Luck Skill Check when they wander in the forest surrounding the giant tree, and again when they reach the tree itself. If they roll a 5 or lower, the beast will be close by and, if they are not trying to move stealthily, will immediately detect them. It will attack on sight unless the party has both deterrence devices from the Voltun and Crenzecan tribes. Use the random encounter map for Berdea if it attacks on the way to the giant tree.
The beast is, thanks to its enhancement, incredibly smart. It is also in constant pain, as its mechanical parts have not been maintained for centuries. It has developed an unending hatred for everything living because of that torture and can therefore not be reasoned with. Even if kept in check with the two devices, it will only be held back because of its programming. Any provocation can be enough for its rage to override it and still attack. It will stay close at a few meters’ distance and wait for an opening.
The giant tree has a large metallic door that is closed and a panel on the side. The door opens automatically if the group has both devices. The player characters can attempt to open the door with a Brute Force Skill Check and succeed on an 11 or higher. They can also try to open it through the panel. Let them roll a Computer, Lockpicking, or Engineering Skill Check. On a 7 or higher, the door opens up without any problems. It still opens if they roll lower, but it will also trigger a loud alarm that will immediately draw the T-Rexes‘ attention, causing it to sprint towards the tree at max speed and get there in less than a minute. On a critical failure, the door stays closed.
Once the players open the door, a timer will start if they have not already encountered the mutated cyborg T-Rex. It will realize that the door to its home is opened for the first time and walk over to rest in roughly 15 minutes.
The inside of the tree is dark. The lights burned out long ago, and only the sunlight shining through the main entrance brings any light. In the center of the room is a giant vat. It is broken as if something broke it from the inside. This is where the T-Rex was born. The rest of the room is filled with all sorts of machines, lab equipment, and other smaller vats. Most of it will be beyond the player characters’ understanding. This was the lab of Cozal‘s parents. It can be plundered for crafting materials and counts as a high-value harvesting area that will run out after three gathering attempts. There is a staircase in the back that leads up to the living quarters.
Going up the stairs will lead to a room with one large bed and a small one. In the center floats the crystal that contains Cozal, surrounded by a green magical circle. There are dinosaur-shaped toys on the left and a diary that was clearly written by a child. It will contain images of Cozal playing with the mutated cyborg T-Rex, calling it the big protector. She has written down how her parents told her to never leave, because other people are dangerous. In the last pages, she will mention that her parents have been away for a long time and that she is hungry. The last page only contains the sentence “I wish somebody would help me,” and it is slightly burned. This was caused when Xeldrun appeared in front of her.
The backrooms only contain a bathroom and a kitchen. There is nothing of value there.
When the party walks down the stairs, the T-Rex will be waiting in the dark, resting if it was not dealt with before. Feel free to describe how its eyes glow menacingly in the dark.
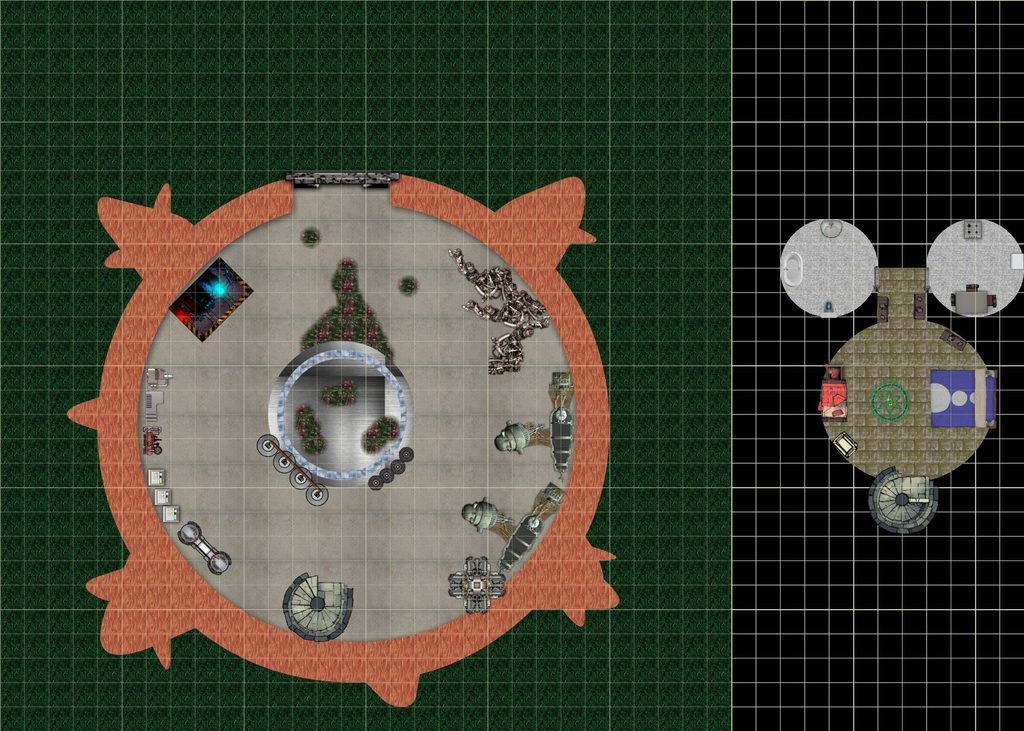
The Spark of Waki
As soon as the five crystals have been assembled, the player characters will feel the earth moving as a crystalline structure rises out of the sea at the center of the map. Stairs circle around its side, leading to an entrance on the side. Water still slowly flows out of it as it empties from being submerged.
The entrance leads to a single central chamber where Xeldrun is sealed away in a large dark crystal. Surrounding the crystal are five magic circles, one for each crystal. Once the crystals are placed, the seal will be broken.
Doing so will cause the six crystals to break apart. Bones fall out of them, as the bodies of the five have long since rotted away. A flicker of their spirits attempts to escape before being pulled towards the center where Xeldrun emerges. A part of his power will materialize as a white crystal with rainbow patterns in the hands of the person who placed the last crystal.
The demon is a tall, pitch-black creature with thin limbs but a surprisingly graceful face. He exudes an unnatural charisma. Each of his words is spoken calmly, as if he is in full control of the situation.
Xeldrun will stretch before thanking the party for freeing him. He offers to make them his servants in exchange for the power to travel the multiverse. If the player characters accept, they will be bound to his will and basically fall for the same trap as the five before.
If the party refuses, Xeldrun will ask for the crystal that materialized in one of the characters’ hands, claiming that it is his. He will not tell them that it is part of his power and that he is still severely weakened without it. Should they give it back, he will absorb it into his being and immediately vanish into another universe.
Xeldrun‘s demeanor will change quickly should the party refuse, as he lashes out in anger and attacks them. Use the Soul Harvester stat block and calculate his Level for the encounter as if the party were Level 6, even if they are weaker. He will use the Swarm of Lost Souls as his main summon.
Xeldrun‘s main goal is to get his power back. He will prioritize the character who has the crystal. If that player goes down, he will then try to pick up the crystal and reabsorb it. This process takes an entire turn, so the party still has a chance to get the crystal back before he vanishes.
If the group manages to defeat Xeldrun, his essence will be absorbed by the crystal, fully undoing his bond with the five. This will fully undo the ritual, sending each of the Waki Islands back to their original universe and sending the crystalline structure, including anyone in it, into a space between universes.
The white crystal itself will turn into the true Spark of Waki. Whoever is holding it will be able to see into other universes and travel there at will. They can also take others with them, allowing the entire group to visit other universes together.
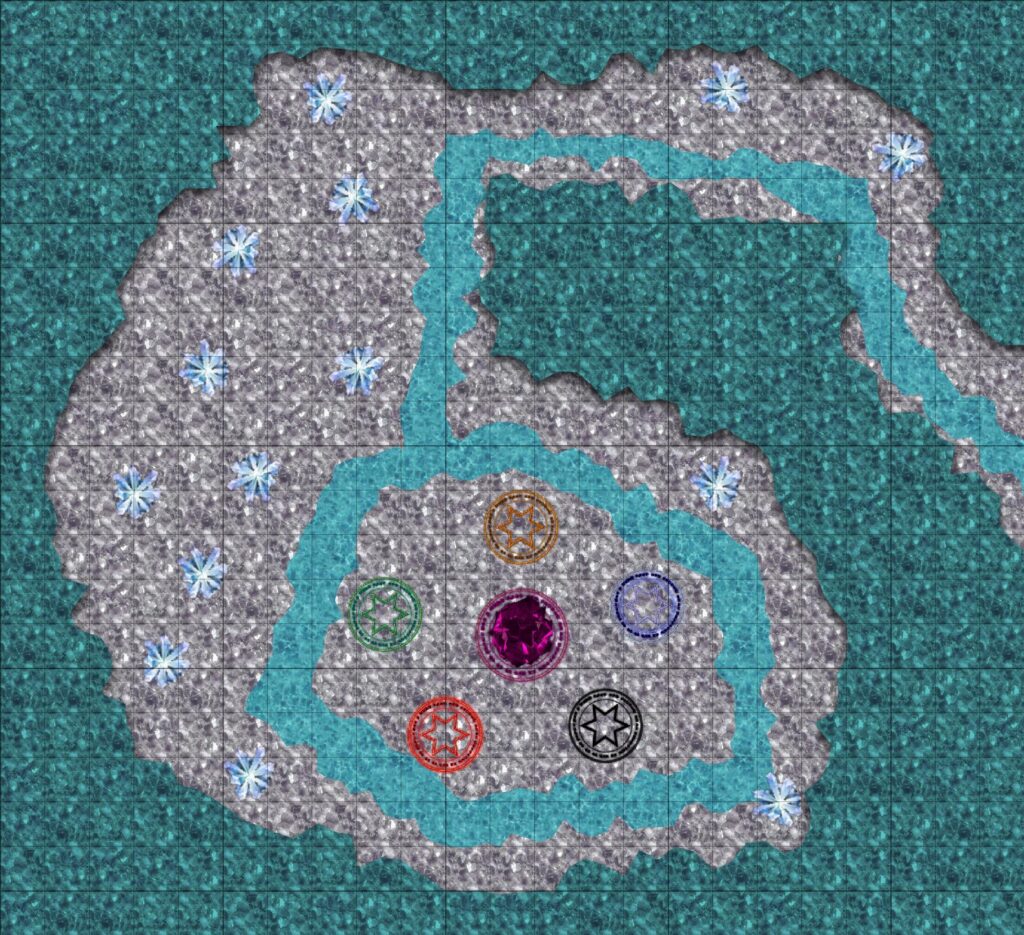
Epilog
Whatever the players decide to do, the adventure ends once they have dealt with Xeldrun in one way or another. I suggest that, after the players have had some time to roleplay, you switch to a more narrative-style description of what happens next, while occasionally asking the players about key decisions. Their decisions in the finale will, of course, heavily impact the future. You could also continue the adventure if the group wants to go on.
If they took the deal, they will be bound to Xeldrun, forced to serve him as they travel to other universes. They will have to do some foul things, but if the characters are evil, they might actually quite enjoy this lifestyle. Xeldrun is more than willing to reward loyalty and immorality. Ask the players whether their characters will start to regret the deal or revel in this servitude.
From this path, you could continue the story in different ways if you like. This could become a campaign about seeking freedom or becoming loyal servants of ultimate evil.
The story ends in a rather unsatisfying way if Xeldrun manages to escape with all of his power. The party will be left with no treasure or anything, forced to sail back home. To be fair, the islands do have some riches, so depending on what the group managed to find, their pockets might not be so empty. Ask the players what their plans are for now and how their characters feel about not having found the Spark of Waki.
From this path, the players could continue being adventurers, exploring other places in their current world. They could also seek a way to hunt down Xeldrun to get revenge or even be contacted by The Storytellers or The Light of Creation that scold them for letting such a menace lose, but also invite them to join them to fix their mistakes.
The possibilities become virtually endless if the party manages to defeat Xeldrun and obtain the true Spark of Waki. What do the player characters want to do with such an incredibly powerful artifact? Do they wish to explore more worlds? Do they use it selfishly? Do they believe this power to be too great and swear to hide it from the world? Maybe it could even cause a rift in the party. Let the players decide.
This path opens up a lot of ways the adventure could continue, allowing for a true free-form multiverse campaign. Let the players be creative. However, whatever they decide to do, they might attract the attention of one or more of the four multiversal organizations of the Headcanon Multiverse…
That’s it, folks. I hope you and your players had fun with this adventure.